Front yard planning
Foundation planting ideas that leave room for the house
The short answer
Good foundation planting does not hide the house. It frames the entrance, keeps mature plants clear of windows and the wall, and repeats a small set of forms across the facade. Plan from mature width first, then choose the plants.

Start with the house, not a row of shrubs
A foundation bed has three jobs: connect the house to the yard, make the entrance easy to read, and leave enough space for windows, paint, repairs, meters, and airflow. A continuous hedge often fails because it treats every part of the facade as the same problem.4,1
Walk to the curb and mark the door, windows, corners, downspouts, hose bibs, vents, and utility access. These fixed features decide where a plant can mature without becoming a pruning project. The container size at the nursery is not the planning size.2,3
If wildfire is part of your local risk, check current defensible-space guidance before copying any foundation-bed example. Rules and best practices may limit plants and combustible mulch immediately beside the house.7
Read the rain pattern before you place plants
The same foundation bed can contain a sheltered strip that receives little rain, an ordinary planting zone, and a concentrated outlet path. Watch the bed during or just after rain before treating it as one uniform site.
Sheltered strip under the eave
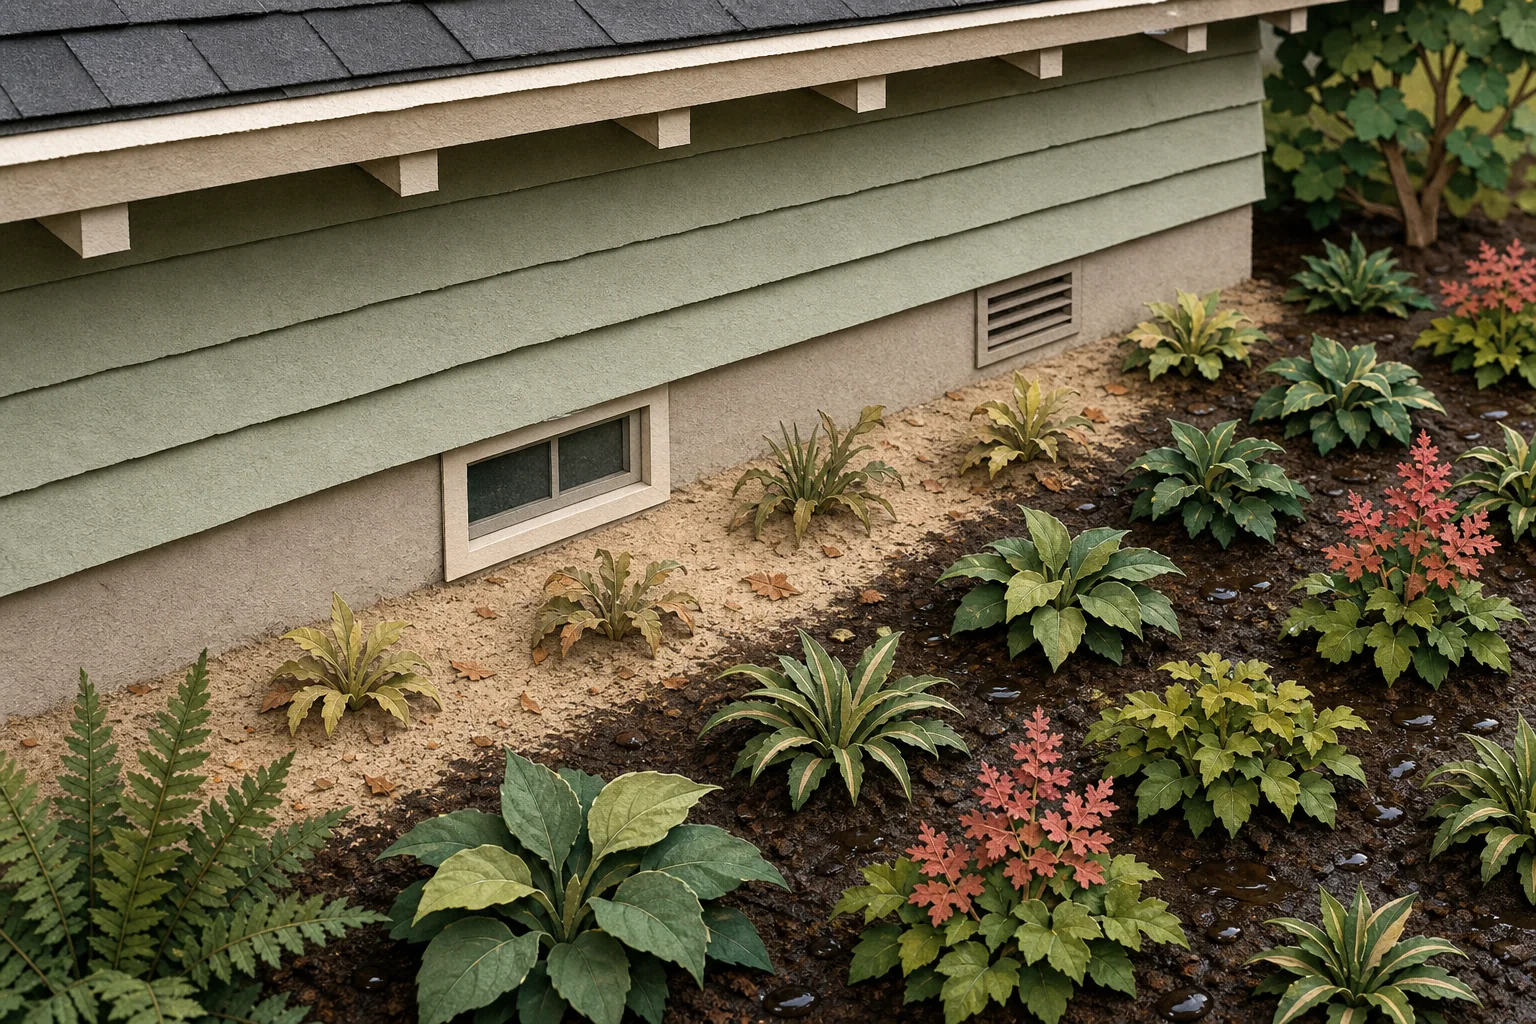
- What you may observe: Soil close to the wall stays noticeably drier than the soil farther forward, even after a useful rain.
- Planting decision: Keep inspection access open and choose only plants that fit both the available light and the drier soil. Shade tolerance alone is not enough.
- Check it yourself: Compare soil moisture near the wall and beyond the eave after rain, then repeat the check in another season.
Ordinary receiving area
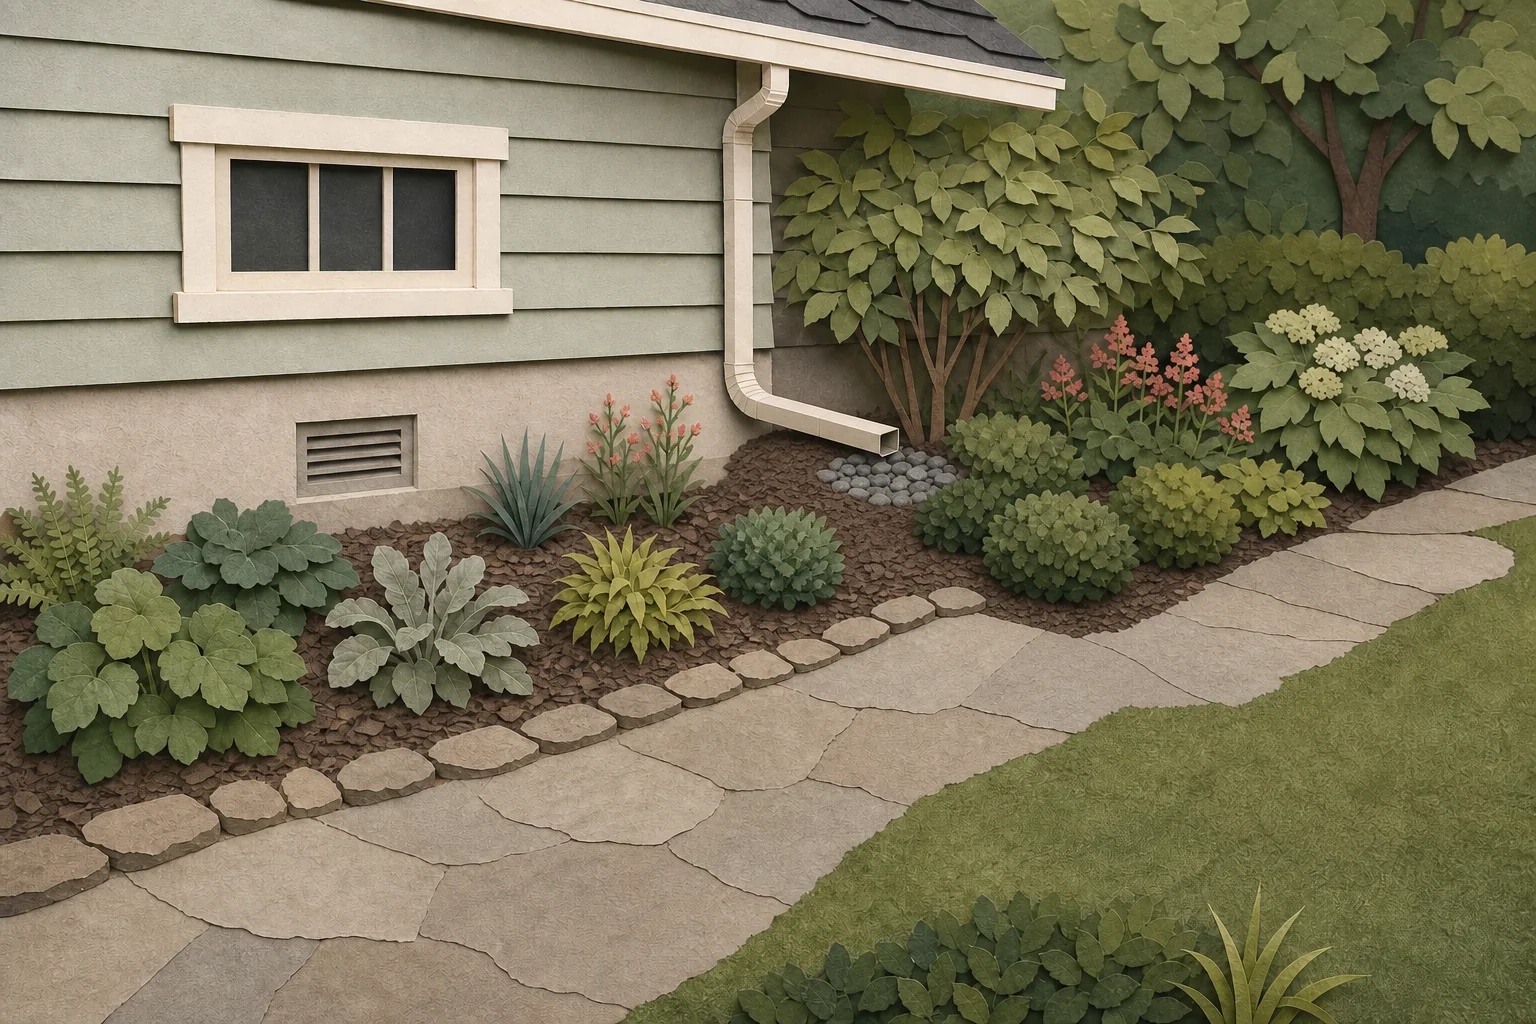
- What you may observe: Rain reaches the bed without a concentrated stream, and the soil drains on a normal schedule for the site.
- Planting decision: Use this area for the repeated shrubs and lower masses that organize the facade, while preserving windows, vents, and wall access.
- Check it yourself: Check sun, soil moisture, mature plant width, and the routes needed for inspection and maintenance.
Concentrated outlet path
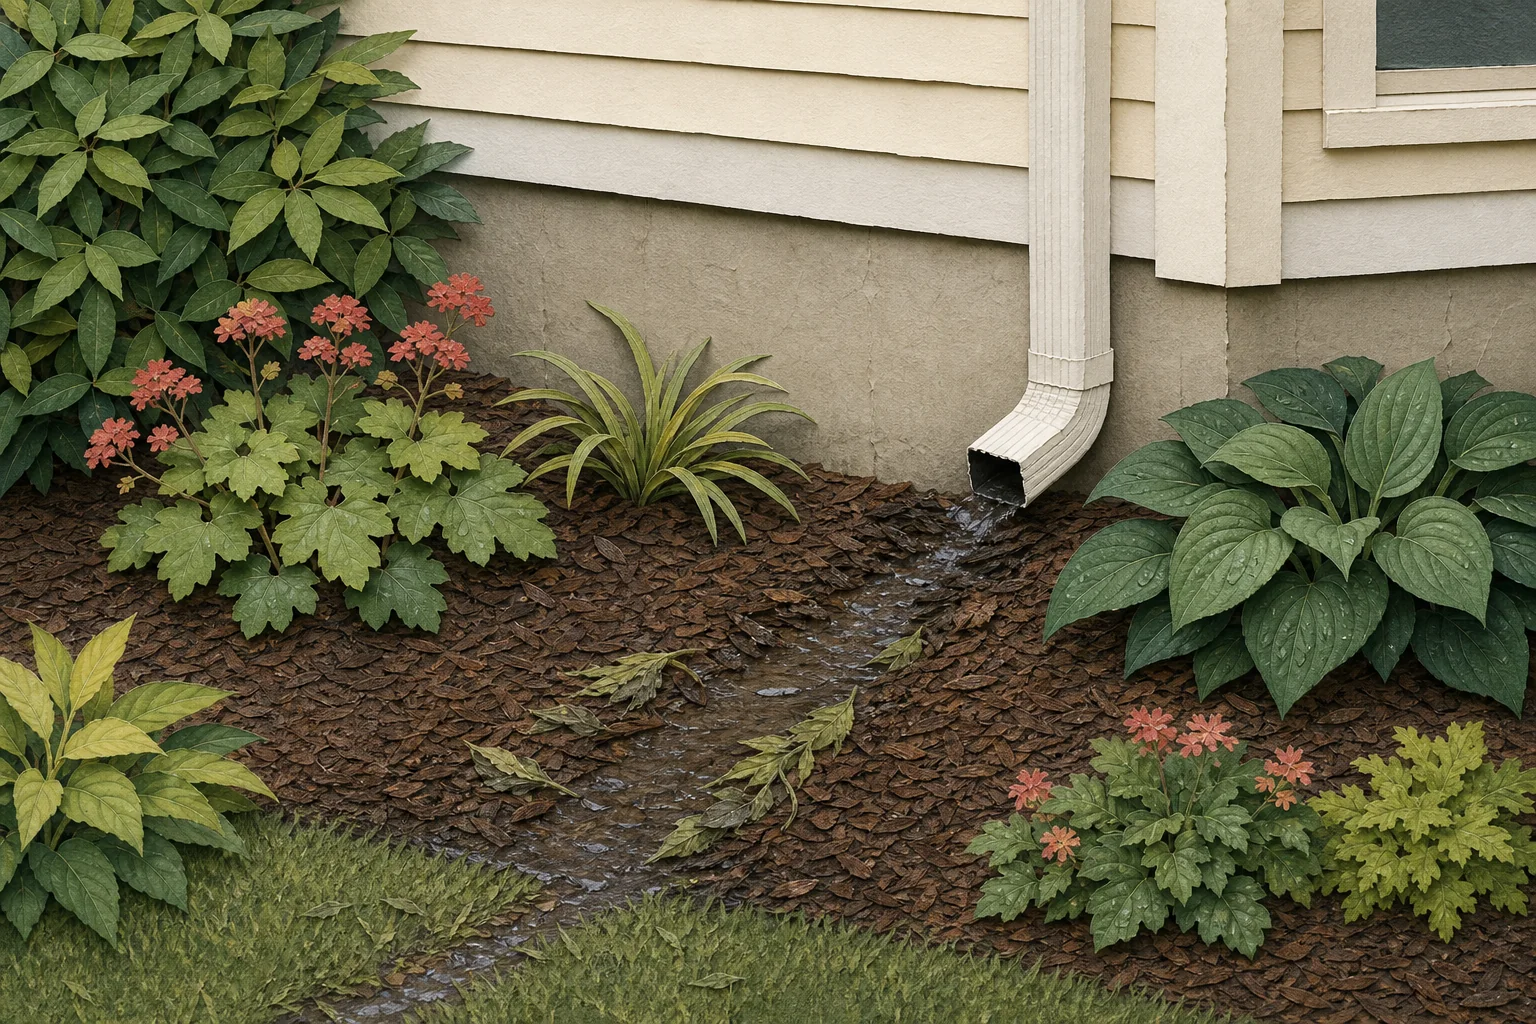
- What you may observe: A downspout or roof edge creates a wet streak, displaced mulch, flattened foliage, or a recurring low spot.
- Planting decision: Do not put a plant crown in the flow path. Resolve where the outlet safely sends water before designing the planting around it.
- Check it yourself: Watch more than one storm. If water ponds against the house or enters a basement or crawlspace, treat that as a drainage or building issue rather than a planting problem.
These generated illustrations show observable patterns, not a drainage diagnosis. Your roof area, soil, slope, outlet, climate, and local rules determine what is safe.
Sources: University of Minnesota Extension, Penn State Extension
Map the roof-water path in four passes
Keep the planting decision separate from the drainage decision. First record where water arrives and leaves; then design only inside the areas that are safe to plant.
- 1
Watch one ordinary rain
Photograph the bed during or just after rain. Mark the dry wall-side strip, the normal receiving area, and any concentrated flow or washed mulch.
- 2
Protect the wall and service route
Keep enough open space to inspect siding, vents, meters, hose connections, and the outlet. Do not use plants to hide a moisture or access problem.
- 3
Resolve the outlet before the palette
Confirm that roof water has a safe destination away from the structure and neighboring property. Use the Rain Garden Design guide only if the site is suitable for an intentional runoff garden.
- 4
Then choose plants for each observed zone
Match mature size, light, and soil moisture rather than choosing one plant list for the entire wall. Contact 811 before digging and verify local drainage, utility, and fire guidance.
Planting does not fix grading, foundation drainage, persistent ponding, or interior moisture. Those conditions need appropriate local evaluation before the bed is planted.
Lay out the foundation bed in this order
Do not begin by filling the whole wall. Protect the important clearances first, then use plants to connect the remaining spaces.
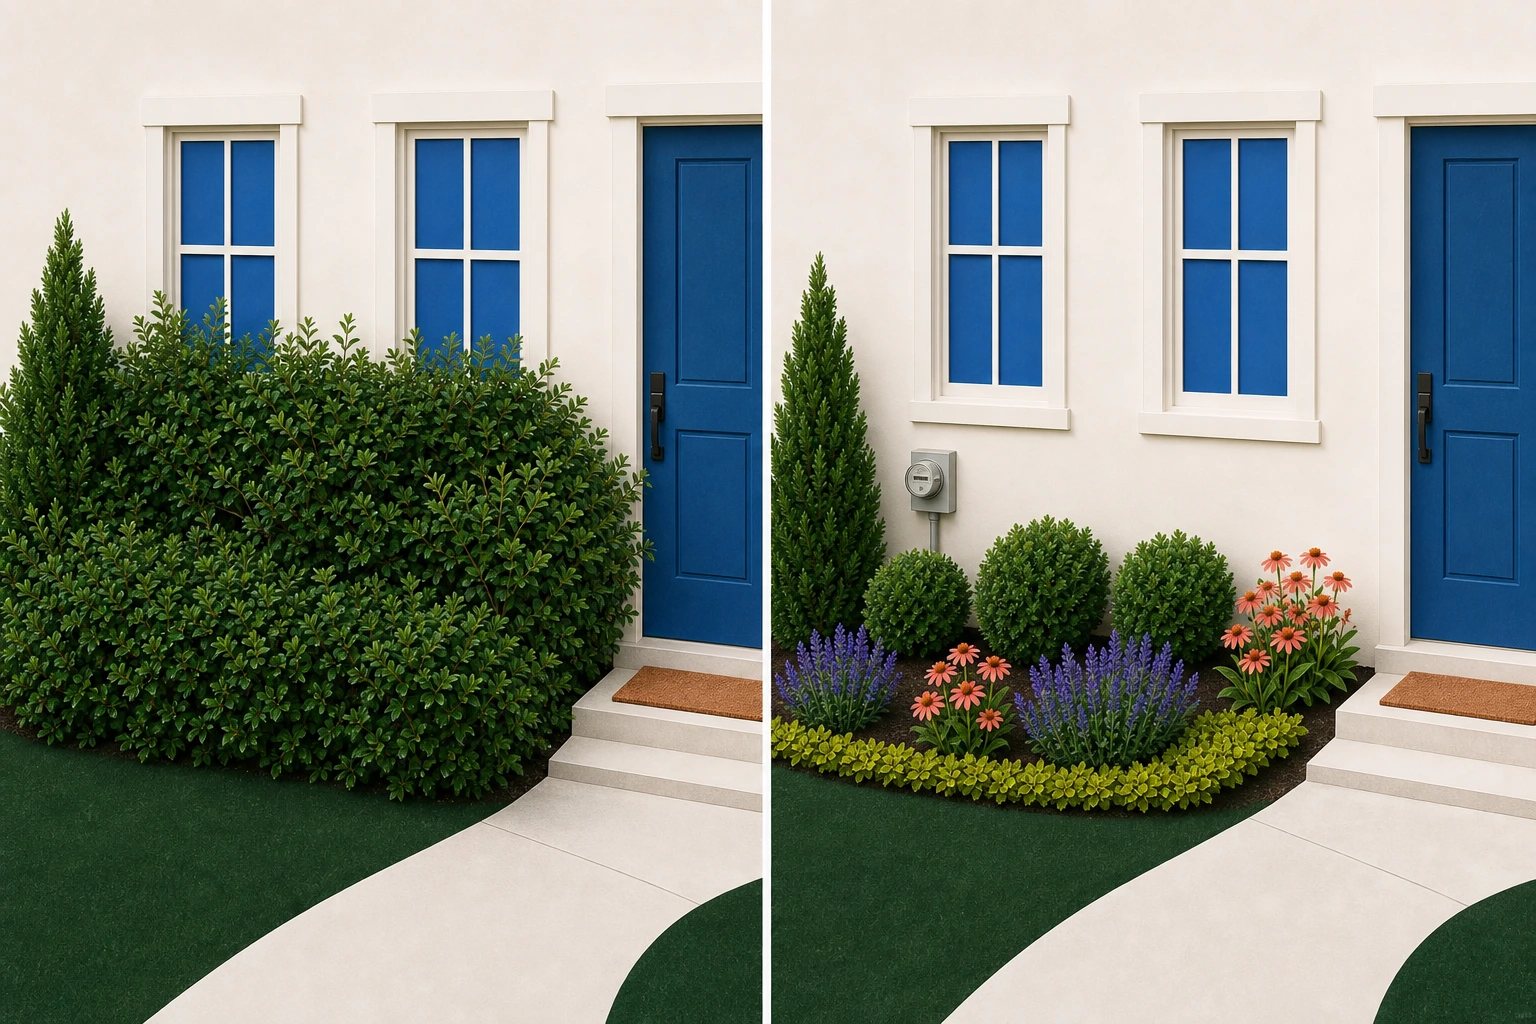
- Overgrown at maturity
- Clear at maturity
- 1
Keep the front door visually open
Use the strongest plant near the entry as a frame, not a screen. From the sidewalk, a visitor should understand the route without looking for it.
- 2
Draw the mature window line
Choose plants that can stay below the sill or beside the window at mature size. Constant shearing is evidence that the plant is too large for the location.
- 3
Reserve wall and utility access
Leave a working strip for painting, inspection, meters, vents, and hose connections. Keep thorny plants away from places someone must reach.
- 4
Place corner structure sparingly
One upright shrub or small tree can hold a corner. Repeating tall accents at every break makes a small facade feel crowded.
- 5
Fill with two repeated masses
Repeat one compact shrub and one flowering or foliage group. Repetition lets the planting read as one design from the street.
A worked plan for two windows and one door
This example shows the quantity logic, not a universal plant prescription. Confirm the mature size and site fit of every local substitute.
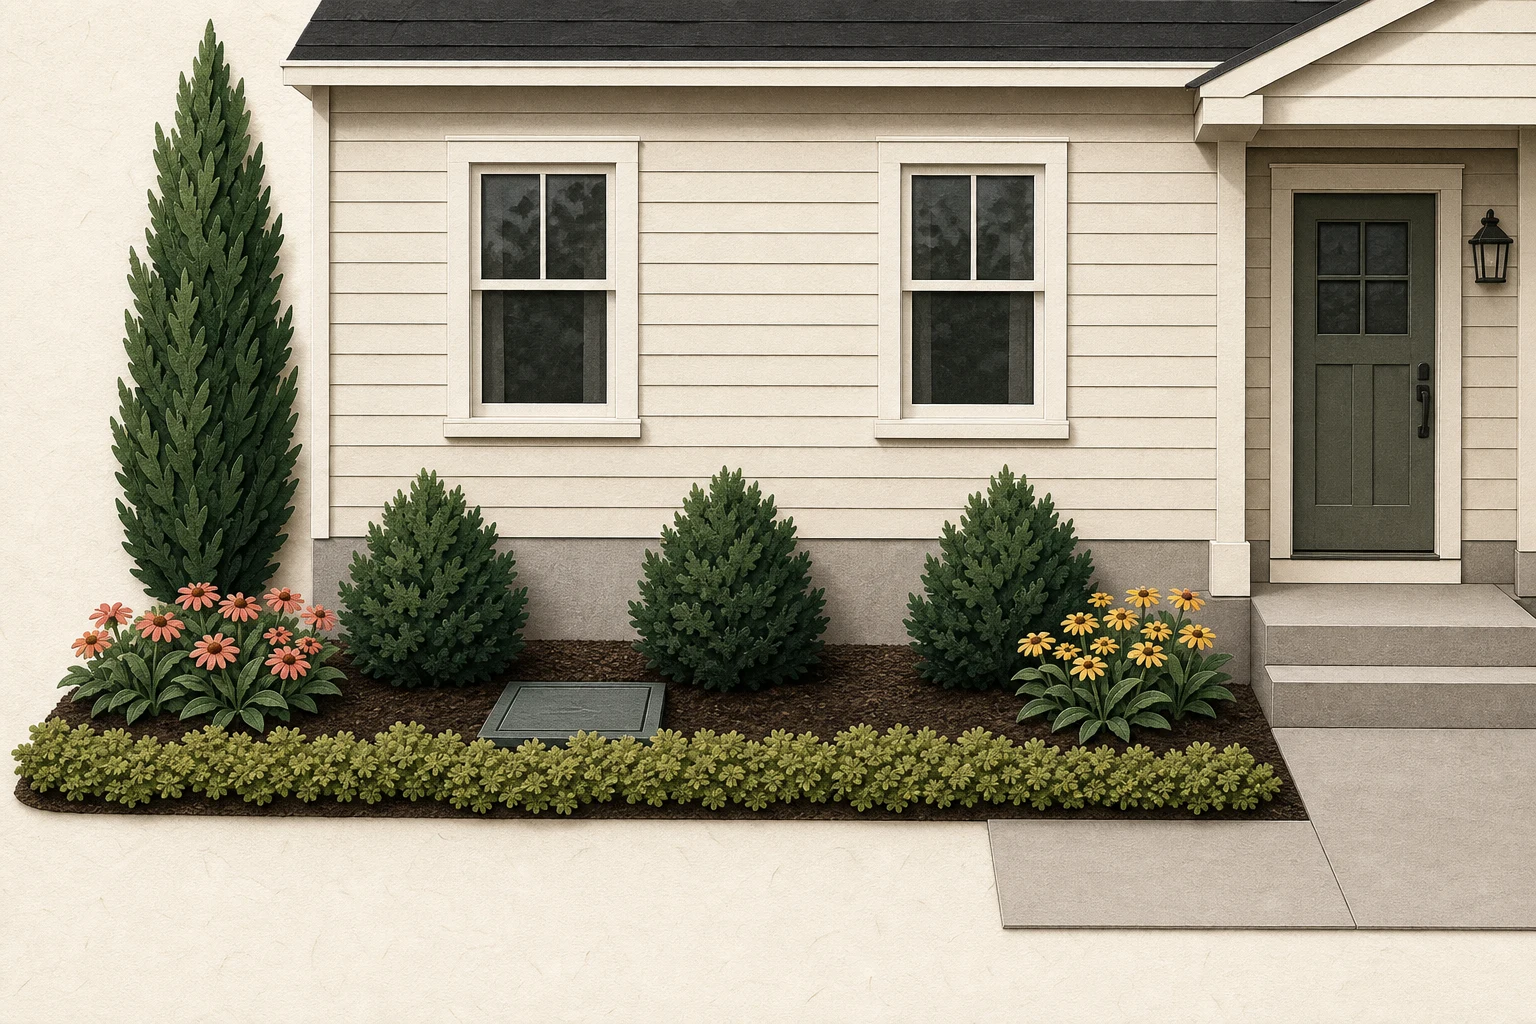
Two windows, one door, and a low roofline
The bed runs along the visible half of a one-story house. The door occupies the right third and the windows begin about three feet above the bed.
See the plan notes
One upright corner plant
Choose a form that fits below the roof and away from the wall at maturity. It gives the composition one vertical stop.
Three compact evergreen shrubs
Repeat the same moderate-height structure below the windows, leaving their mature edges short of the wall and sill.
Two groups of three flowering plants
Place one group near the entrance and one near the corner. Matching groups connect the facade without forming a hedge.
Five to seven low edging plants
Use a low repeated edge only where it clarifies the bed. Leave the door landing and utility path open.
Buy for the mature plan, not the empty first-season gaps. Mulch and patience are usually cheaper than overcrowding plants you will later remove.
Turn the facade into a photo-based plan
Photograph the house from the sidewalk or the main arrival view. Keep the whole door, windows, and bed edges in frame. A straight-on image makes height and clearance decisions easier to compare.
In Gardenful, select the bed you want to change and keep the house and unselected surfaces visible. Use the result as a planting direction, then verify mature spread, light, water, drainage, utility access, and local restrictions before buying.
Check before the nursery
- 1Measure the wall, bed depth, sill height, and door landing.
- 2Write the maximum mature height and width allowed in each planting zone.
- 3Ask the nursery for locally suitable plants that stay within those limits.
- 4Keep the receipt and labels until the final placement is confirmed.
Frequently asked questions
How far should shrubs be from the house?
Plan from mature width, not the pot. One extension rule is half the mature width plus at least one foot from the structure, but access, airflow, fire guidance, species, and local conditions can require more room.
Should foundation plants cover the foundation?
They can soften the transition between house and yard without hiding every inch. Keep siding, vents, windows, meters, and maintenance access clear.
What should go under a front window?
Choose a plant whose normal mature height stays below the sill. A smaller plant that fits is usually easier than a large shrub kept short by frequent shearing.
Can I plant directly under a gutter downspout?
Avoid placing a plant crown in a concentrated outlet path. First observe where the water goes and make sure it has a safe destination away from the structure. Then choose plants for the moisture and light in the remaining plantable zones.
What changes in a wildfire-prone area?
Foundation planting and mulch may be restricted by current defensible-space guidance. Check your state and local fire authority before placing vegetation or combustible material close to the house.
Can Gardenful design a foundation bed from a photo?
Gardenful can use a yard photo and selected project area to create a planting-led visual direction with plant choices, roles, and suggested quantities. Verify final site and access details locally.
 Gardenful
Frame the entrance before you fill the bed.
Use a straight-on photo, mark the foundation bed, and build a visual direction around the door, windows, and the space mature plants actually need.
Gardenful for iPhone
Download the app free and start with a photo of your yard.

Sources
These sources support the design and clearance process. Plant selection and construction limits still need local verification.
- [1]Landscape Design: Ten Important Things to Consider
University of Florida IFAS Extensionhttps://ask.ifas.ufl.edu/publication/ep375
- [2]Landscape Design: Aesthetic Characteristics of Plants
University of Florida IFAS Extensionhttps://ask.ifas.ufl.edu/publication/EP433
- [3]Right Plant, Right Place
University of Florida IFAS Extensionhttps://ask.ifas.ufl.edu/publication/EP416
- [4]
- [5]Gardening in the Shade
University of Minnesota Extensionhttps://extension.umn.edu/gardening-minnesota/gardening-shade
- [6]
- [7]Mulch
UC Agriculture and Natural Resources Fire Networkhttps://ucanr.edu/program/uc-anr-fire-network/mulch