Gardenful field guide
How to make a planting plan for your yard
The short answer
A planting plan turns a garden idea into a layout you can measure, price, and adapt at the nursery. Measure the bed, draw the fixed features, assign a role to every plant group, and estimate quantities from mature . Then write substitution rules so a missing plant does not undo the layout.
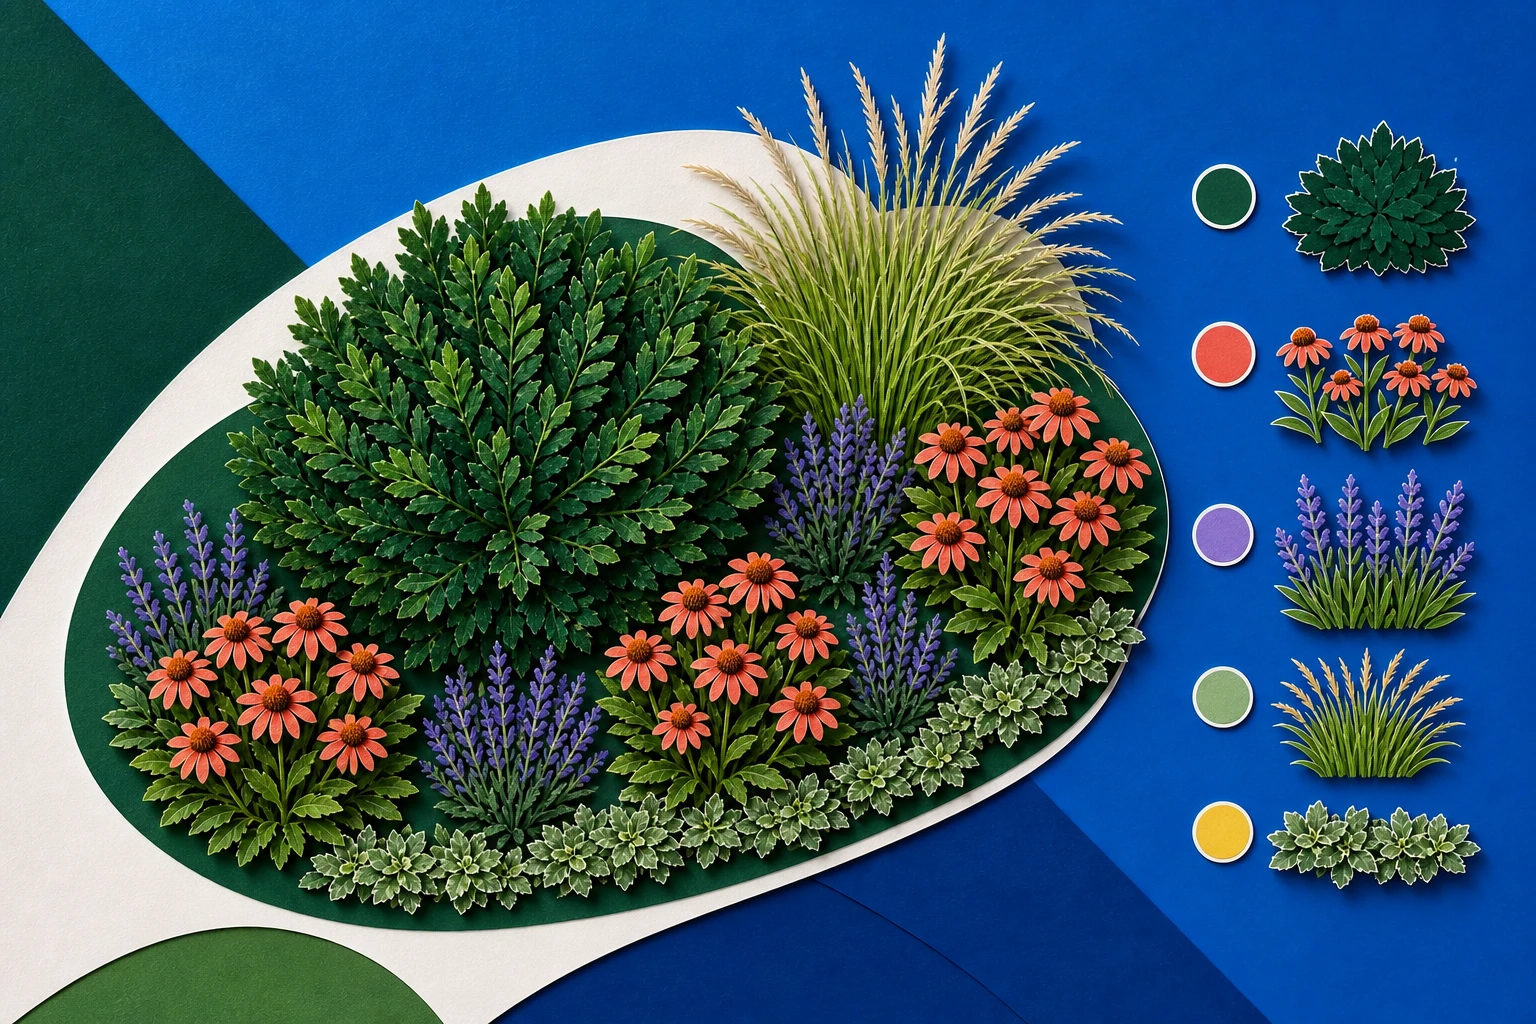
Create a measured base map before adding plants
A rendering can show how a finished yard might look. A planting plan must also record the real dimensions, fixed features, mature plant sizes, and information needed for shopping.
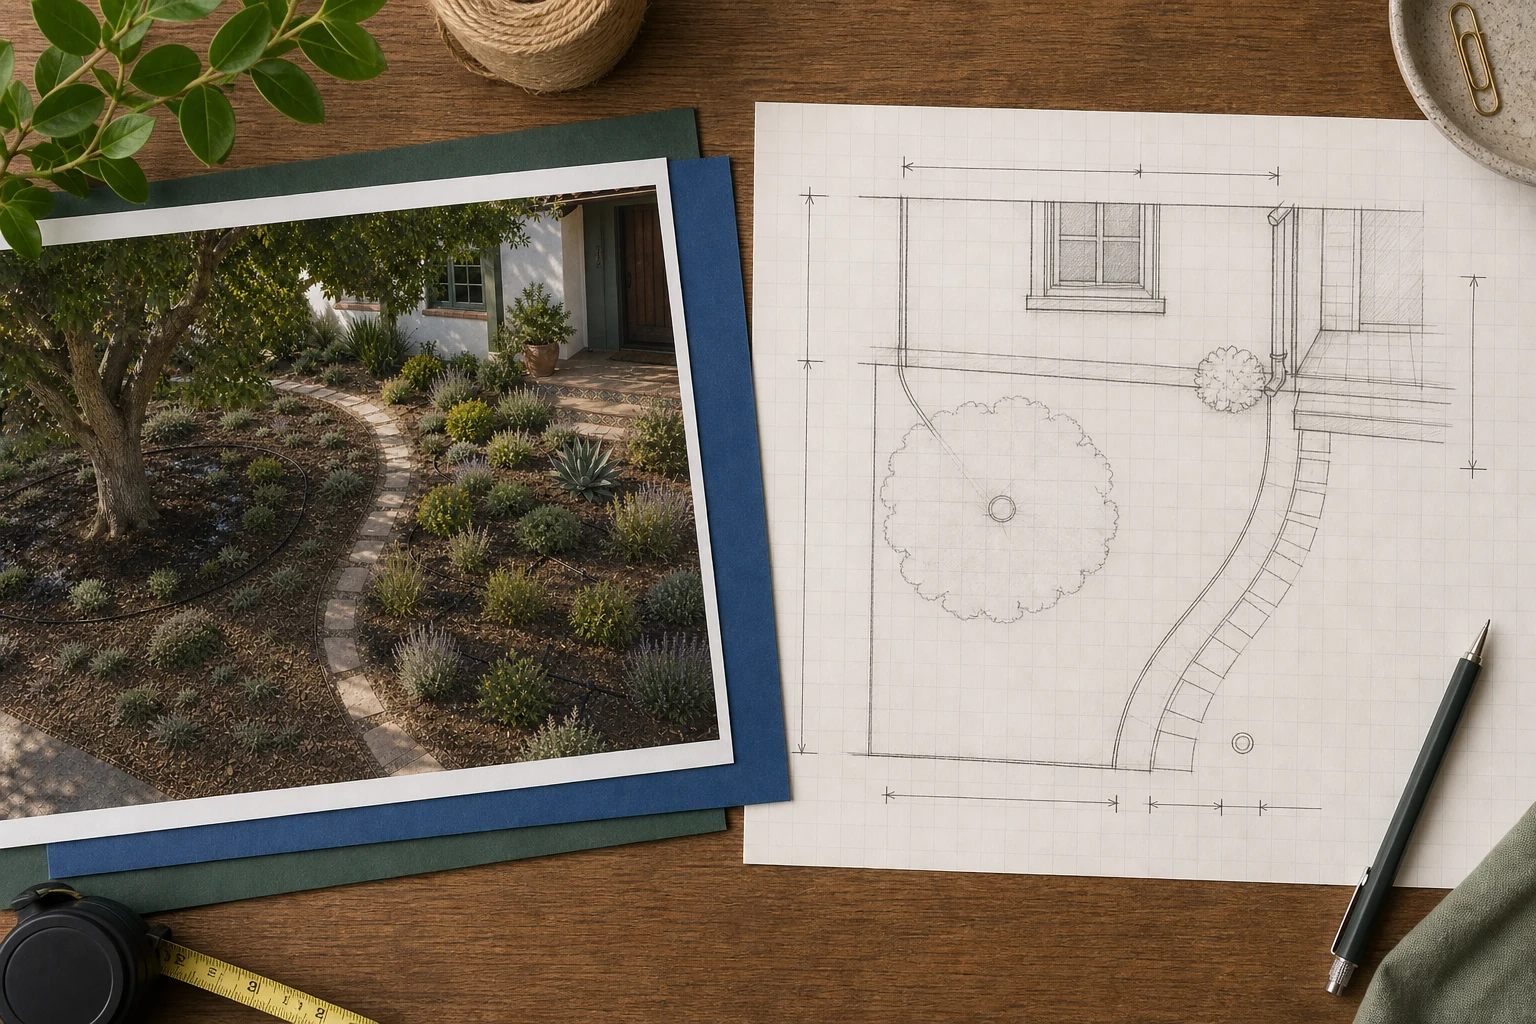
- Yard photo
- Measured base map
Start with a of the real space. It can be graph paper, a printed photo, or a simple digital sketch. Mark the bed edges, doors, windows, downspouts, utilities, paths, existing plants, slopes, and the places you need to reach for maintenance. Measure the widest and narrowest parts instead of treating an irregular bed as a perfect rectangle.1
Add the plants you are keeping at their approximate mature canopy size. This often changes the available area more than expected. A young tree may cast a small shadow today but occupy a much larger part of the plan later.
Only then draw new plants as circles or loose masses at mature width. You are not trying to make botanical art. Check whether the groups look connected, whether plants will collide with the house or path, and whether you can still step in to maintain them.2,4
Define plant roles before choosing species
Define what each plant group must do before choosing exact species. Then a nursery substitution can preserve the layout even when the original plant is unavailable.
The role stays; the exact plant can change
- Structure
- Maximum height and spread
- Repeated flower
- Group count, season, and habit
- Foliage contrast
- Texture or color, repeated
- Edge or ground layer
- Coverage, spacing, and access
A plant list that preserves the layout
A substitute works only when it preserves the role, mature size, and site fit.
Write each role into the plan
Structure: Mark the shrub, small tree, or strong long-lived plant that remains visible for the longest season. Include its maximum acceptable height and spread in the legend.
Example: Legend note: compact evergreen structure, about 3 feet high and wide, morning sun, moderate water, no regular shearing.
Repeated flower: Draw one flowering plant as two or three related groups. State the color range and bloom season, but also record height, spread, and the foliage you will see outside bloom.
Example: Legend note: five plus three of the same flowering plant, 18 to 24 inches wide, summer color, upright rather than floppy at the path.
Foliage contrast: Use leaf color, texture, or shape to keep the plan legible between flower seasons. Repeat it instead of using a different accent in every gap.
Example: Legend note: three broad or silver foliage plants, similar water to the flowering group, no taller than the window sill.
Edge or ground layer: Define where living coverage should close the soil and where access stays open. Include traffic tolerance if the plant sits between occasional steps.
Example: Legend note: low edge at 12 to 18-inch spacing, stays off the main walk, locally noninvasive, and compatible with the same irrigation zone.
If the bed does not need a screen, standalone focal plant, or extra accent, leave that role out. The legend should list only the plant roles the bed actually needs.
Work out spacing and quantities
On-center means measuring from the middle of one plant to the middle of the next. The container edge is irrelevant because containers come in different sizes.
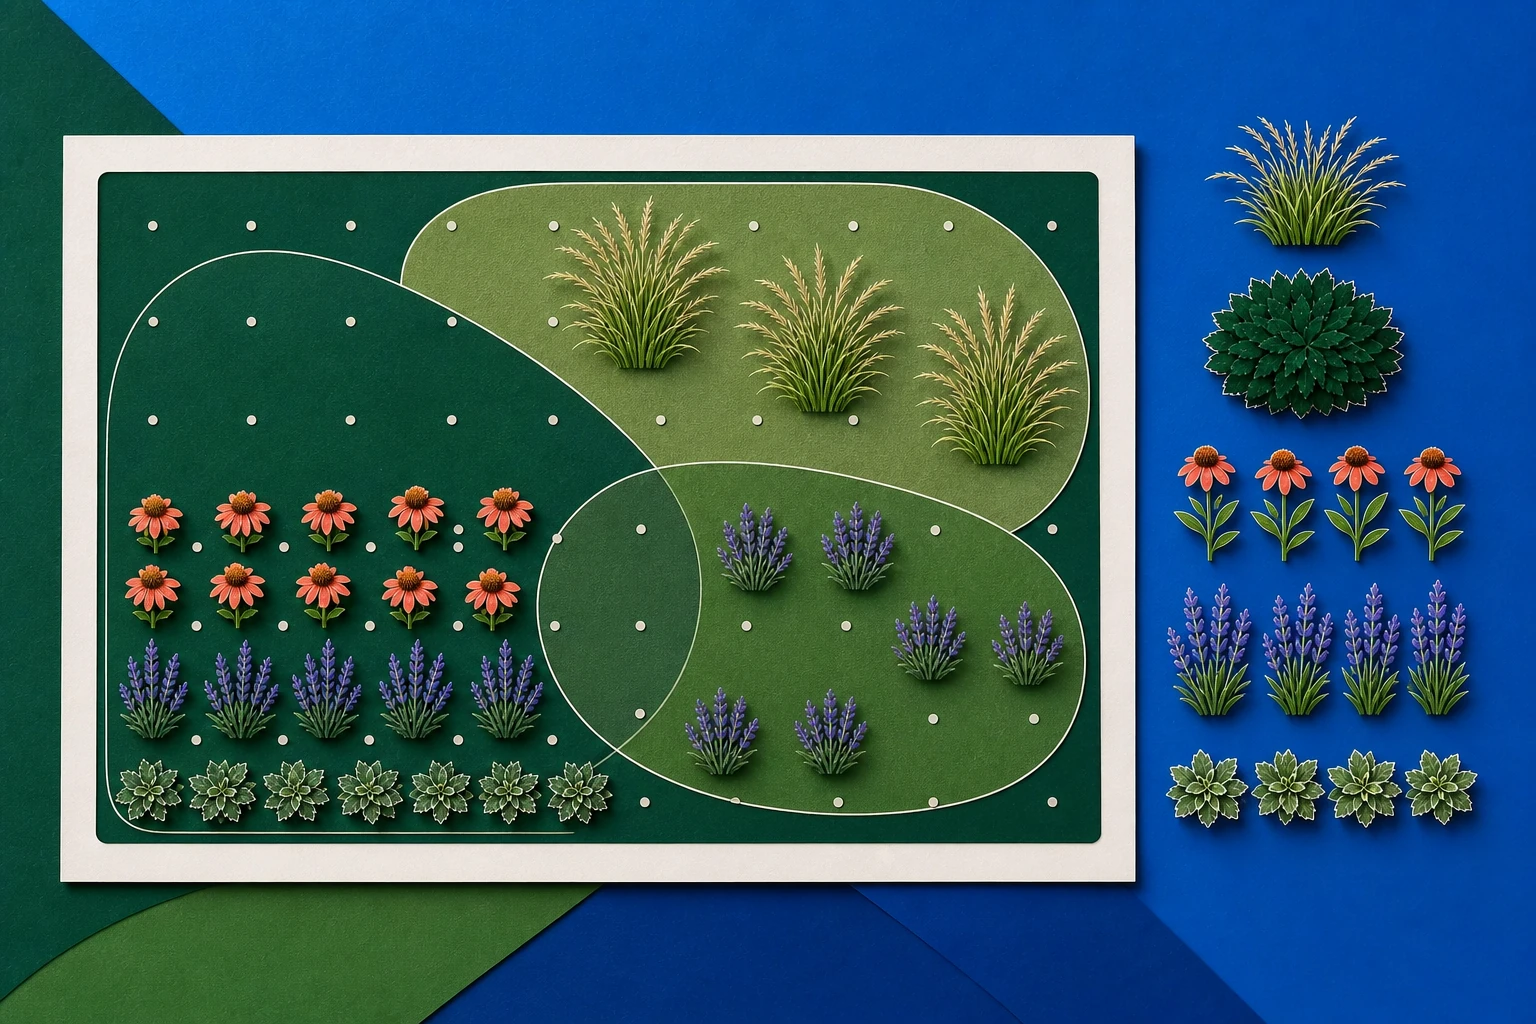
If a plant is listed for 24-inch on-center spacing, place the centers about 2 feet apart. A 12-foot run divided by 2 feet suggests roughly six plants as a first estimate. That is not an automatic order quantity. The bed may curve, the group may be split, and each end needs a sensible setback.2,3
Draw the mature circles before settling the count. If six circles form an awkward row, five arranged as a loose group of three and two may produce a better mass. If the named variety spreads 3 feet rather than 2, the count should fall. Buying more small pots does not change the mature math.2,4a
Do you want a finished look now or a healthy fit later?
Tighter spacing can close gaps faster, but it also increases cost, competition, and future thinning. Wider spacing exposes more mulch and weeds during establishment. Use the recommended mature spacing as the baseline, then make any tighter choice knowingly rather than filling every visible gap at the nursery.2
Treat quantities as a draft until the exact plant is known.
A role such as low flowering edge does not have one fixed count. The final quantity depends on the exact variety, the real bed length, setbacks, group shape, and how quickly you expect the planting to close. Record both the draft quantity and the spacing assumption that produced it.3
Plan a 12-by-6-foot bed
The example below protects a window and a walkway. It demonstrates the sequence, not a guaranteed fit for any particular species.
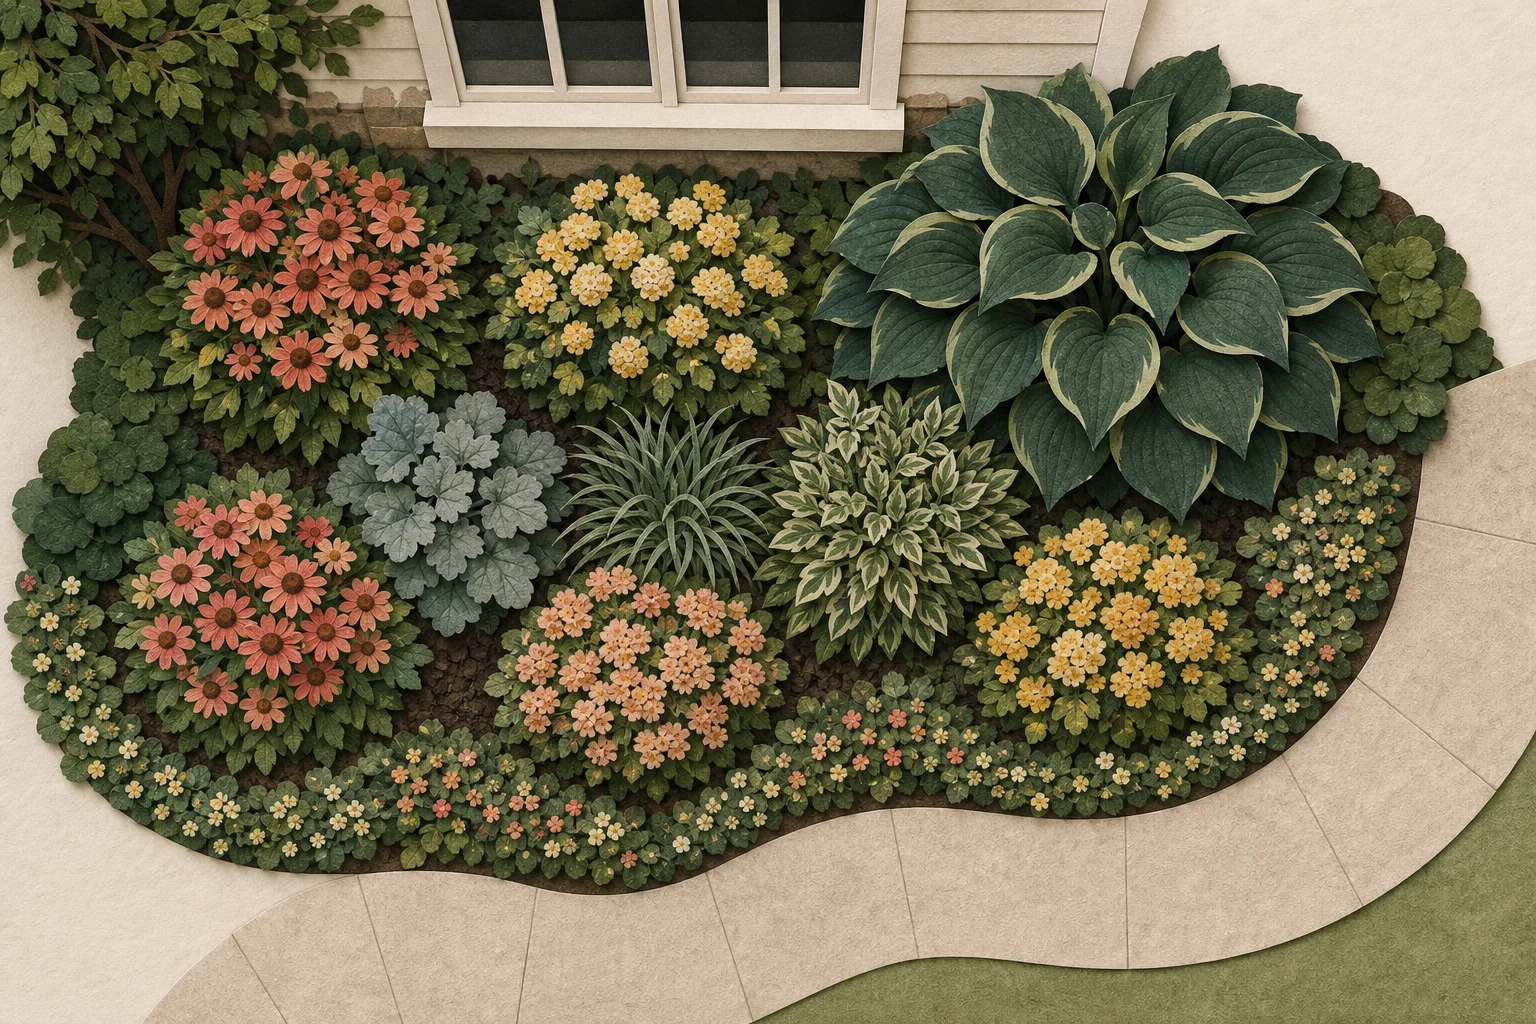
Layered front bed
The bed is 12 feet wide, reaches a maximum depth of 6 feet, and narrows at both ends. The window sill is 42 inches above the soil and the front path needs a clear edge.
- 1
Draw one 3-foot structure circle
Place it off-center and outside the window's main sight line. The legend caps the mature height near 3 feet so regular shearing is not part of the plan.
- 2
Draw five 2-foot flowering circles
Arrange three on one side and two on the other, allowing small overlaps between mature masses but keeping foliage off the walk.
- 3
Fit three foliage contrasts
Place these between the flowering groups. If the exact plant is wider than 2 feet, reduce the count instead of compressing every space.
- 4
Test seven edge plants at 18 inches
A straight calculation is only the first pass. Follow the actual curved edge, leave setbacks at both ends, and lower the count if access disappears.
The draft shopping list has one structure plant, five matching flowering plants, three foliage plants, and up to seven edge plants. Record the mature size, spacing, light, water, and substitution rule for each line.
Set rules for substitutions
Availability changes by week and region. Write substitution rules before shopping so an unavailable plant or flowering display does not change the entire plan.
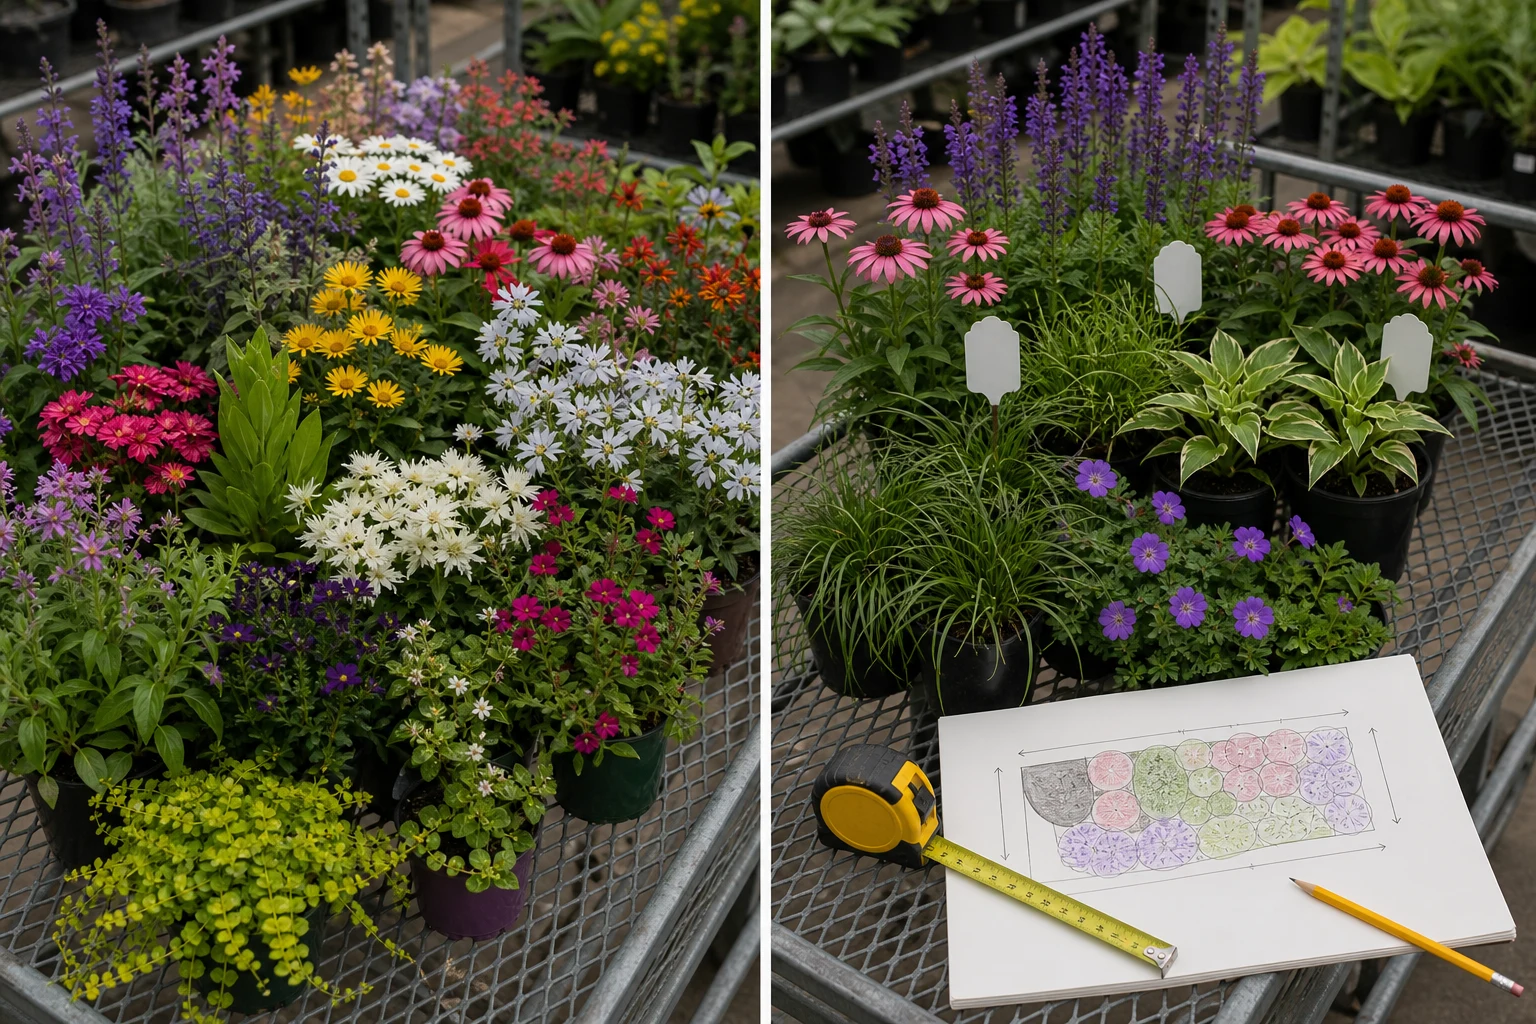
- Color-first cart
- Plan-first substitutions
- 1
Match the original role and mature fit
Compare height, spread, form, light, water, drainage, and climate needs.
- 2
Keep repeated groups intact
Do not replace a matching group with unrelated singles that only look good together today.
- 3
Update the plan before checkout
Record the final variety, spacing, and revised quantity.
- 4
Finish one coherent area at a time
When buying in phases, include mulch, irrigation, soil preparation, and delivery in that phase's budget.
A good substitute performs the same role and reaches a similar mature height and width. It does not have to copy the original flower exactly.
Frequently asked questions
How accurate do yard measurements need to be?
A tape-measure sketch is enough for an early plant plan. Record the widest and narrowest bed points, obstacles, and distances to windows, paths, and utilities. Verify critical dimensions before large plants, irrigation work, or hardscape changes.
How do I calculate how many plants I need?
Divide the usable planting length by the plant's mature on-center spacing for a rough first count, then draw the mature circles and adjust for curves, group shape, end setbacks, and access. Use the exact variety, not the nursery pot width.
Should I buy the entire planting plan at once?
Not necessarily. For a large or unfamiliar project, install one coherent area at a time. Preserve the overall roles and spacing, buy the important structural plants first, and update the plan with final varieties before each phase.
Can I make a planting plan from a yard photo?
Use a yard photo to preserve the house, path, bed shape, and other fixed context, then use a measured base map to set mature spacing and quantities. The photo helps you compare the direction; measurements and local plant checks make the list usable.
 Gardenful
Compare a visual yard idea with your measured planting plan.
Start with a photo and a selected area, explore the layout, then bring the suggested roles and quantities back to your measured plan.
Gardenful for iPhone
Download the app free and start with a photo of your yard.

Sources(5)and 1 note
Notes
- [a]The pot size describes what you are buying today. Mature spread determines how many plants the bed can hold.
Sources
- [1]Drawing a Landscape Plan: The Base Map
University of Florida IFAS Extensionhttps://ask.ifas.ufl.edu/publication/EP456
- [2]Home Landscape Design
Mississippi State University Extensionhttps://extension.msstate.edu/publications/home-landscape-design
- [3]
- [4]Landscape Design with Plants: Creating Outdoor Rooms
University of Florida IFAS Extensionhttps://ask.ifas.ufl.edu/publication/EP449
- [5]The Florida Yards & Neighborhoods Handbook: Right Plant, Right Place
University of Florida IFAS Extensionhttps://ask.ifas.ufl.edu/publication/EP416