Gardenful field guide
How to map sunlight in your yard
The short answer
Sunlight moves across a yard, so one glance cannot describe the light a planting bed receives. Photograph the same area in mid-morning, around midday, and in late afternoon on a clear day. Mark where direct sun reaches the soil, then repeat the check in another season if a tree or building changes the pattern. Use the map to divide the bed into sunnier, mixed-light, and consistently shaded pockets before choosing plants.
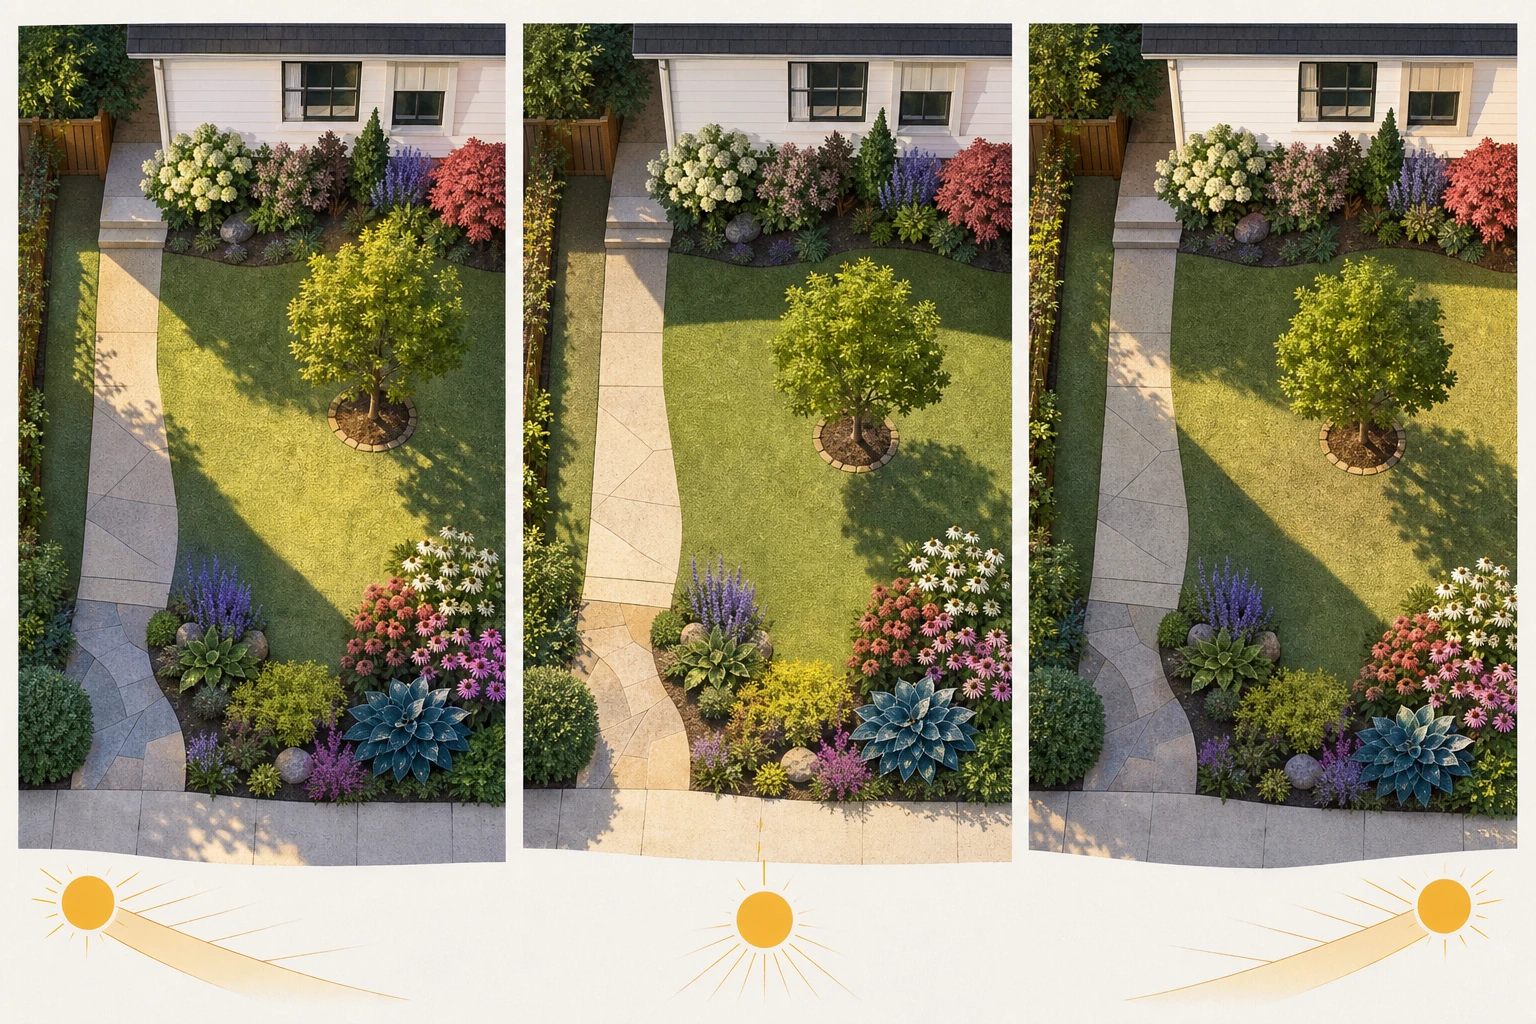
- Morning
- Midday
- Late afternoon
Record the light when it changes the planting decision
You do not need a year of perfect measurements. You need enough observations to catch the shadows that matter.
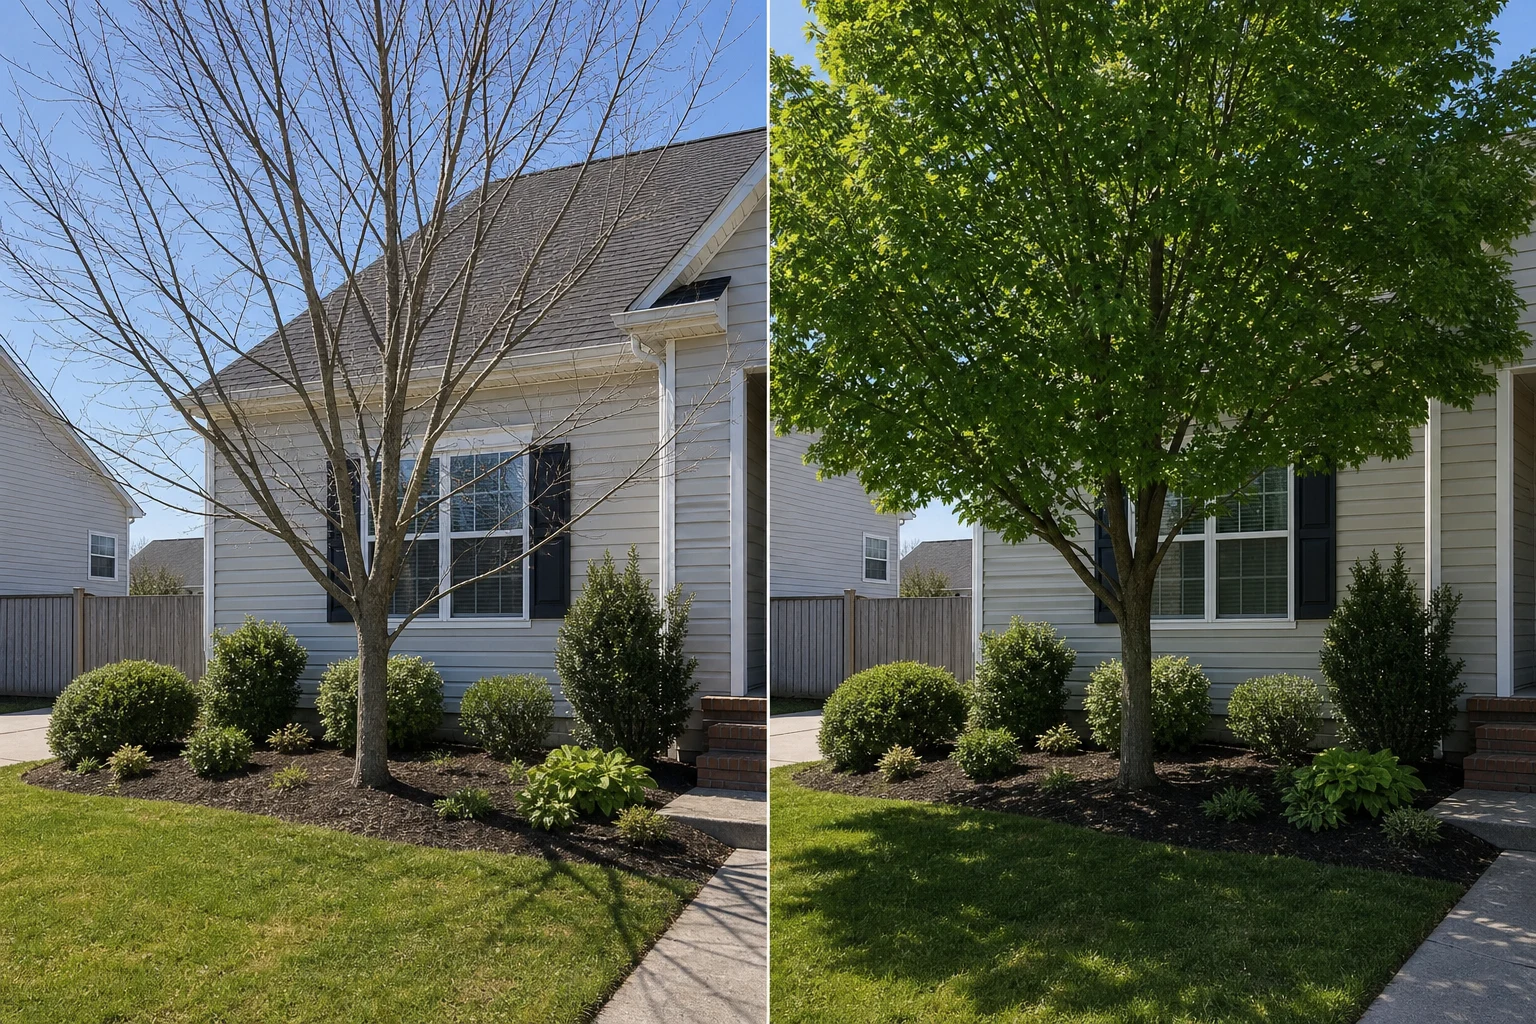
- Leaf-off canopy
- Leaf-on canopy
- 1
Draw the fixed edges
Sketch the house, fence, trees, walk, and bed outline. These objects explain why the light changes.
- 2
Photograph the same frame
Use one camera position in mid-morning, near midday, and late afternoon. Note the date and whether the sky was clear.
- 3
Mark direct light on the soil
Trace the bright areas, not just the sun on taller leaves. A plant at the wall may receive different light from one at the bed edge.
- 4
Repeat when the canopy changes
A deciduous tree can make a bed sunny in spring and shaded in summer. Recheck when leaves emerge or when a seasonal result seems surprising.
Describe the pattern before naming the zone
Plant labels compress light into broad categories. Your map should preserve the useful detail behind the label.
| Observed pocket | What the map shows | What can fool you |
|---|---|---|
| Observed pocketSunny edge | What the map showsDirect light reaches the soil through most observations. | What can fool youPaving or a pale wall may add reflected heat.Nursery questionWill this plant tolerate both the light and the heat? |
| Observed pocketMixed-light middle | What the map showsDirect light arrives for one part of the day and then moves away. | What can fool youThe same duration can feel different in cool morning or hot afternoon light.Nursery questionDoes this plant prefer morning sun or tolerate late-day sun? |
| Observed pocketConsistent shade | What the map showsThe bed stays shaded in every useful observation. | What can fool youDry shade beneath eaves or roots is different from moist shade.Nursery questionWill it fit this shade, soil moisture, and root competition? |
Sources: Oregon State University Extension, University of Florida IFAS Extension
Map a bed that is sunny only at the outer edge
The light map changes what belongs at the hot edge, in the middle, and close to the wall.
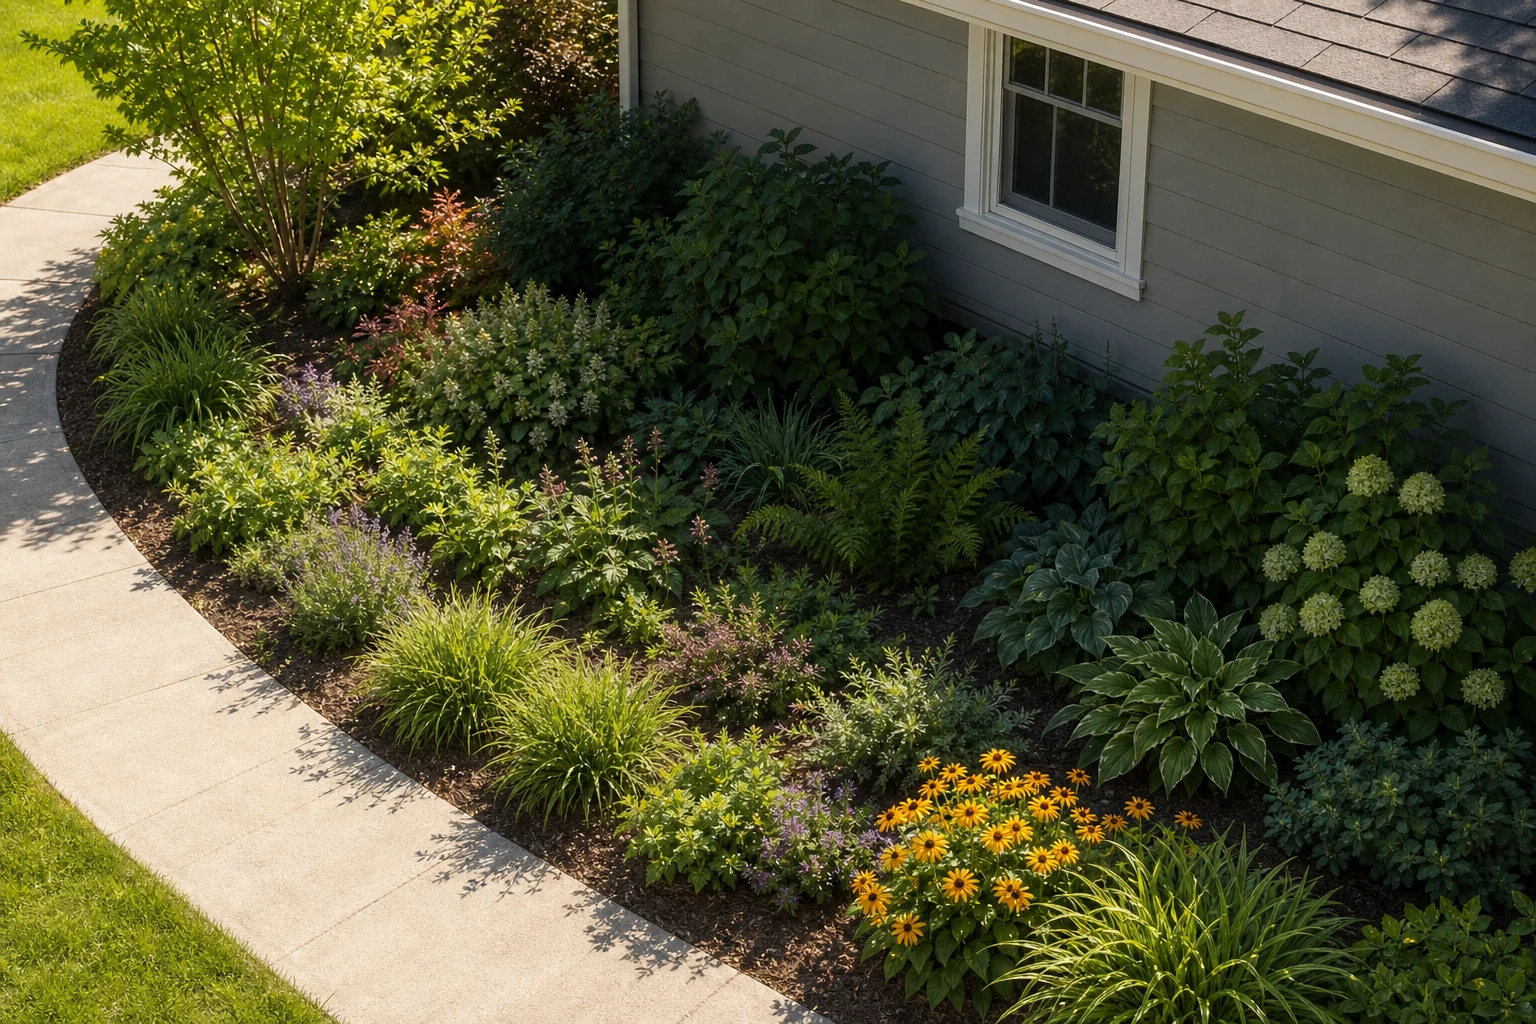
A foundation bed below a west-facing window
The wall shades the inner bed until early afternoon. The outer curve receives several hours of direct light plus heat reflected from the walk.
- 1
Put the toughest low layer at the edge
Reserve the hot outer curve for a low plant that tolerates the observed sun and reflected heat.
- 2
Use the middle as a transition
Repeat a flowering or foliage mass that accepts part-day light rather than forcing one sun-loving plant through the whole bed.
- 3
Keep the wall pocket simple
Use shade-tolerant structure or mulch where the eave keeps both light and rain from reaching the soil.
The bed now has three planting areas, each with a different mix of light and heat.
Check soil, moisture, and mature size
The light map narrows the choices. These final checks help you choose plants that will fit the bed.
Season: Note whether the observation happened before or after trees leafed out.
Moisture: Check whether eaves, roots, slope, or irrigation make the shade unusually dry or wet.
Mature size: Draw the plant at mature width around windows, paths, vents, and neighboring plants.
Local fit: Confirm the exact plant with a regional source or nursery before buying.
Frequently asked questions
How many hours of sun should I measure?
Use six or more hours of direct sun as a practical starting point for full sun. University of Minnesota Extension describes part shade as about three to six hours and full shade as less than three. Record those hours for each part of the bed, along with whether they fall in the cooler morning or hotter afternoon.
Can I map sunlight with my phone?
Yes. Photos from the same position at several times are often enough for a first planting plan. Add the date and repeat the sequence when a deciduous canopy changes.
Do I need to observe the yard for a full year?
No. Start with a clear-day sequence during the growing season, then recheck after major seasonal canopy changes or before buying an expensive long-lived plant.
 Gardenful
Bring a useful sunlight map to your first design.
Map the bed first, then use Gardenful to compare planting directions for the actual sunny and shaded pockets.
Gardenful for iPhone
Download the app free and start with a photo of your yard.

Sources(3)
- [1]Observe a Landscape Through All Seasons
Oregon State University Extensionhttps://extension.oregonstate.edu/sites/extd8/files/2018-07/design_principles_7.pdf
- [2]Right Plant, Right Place
University of Florida IFAS Extensionhttps://ask.ifas.ufl.edu/publication/EP416
- [3]Gardening in the Shade
University of Minnesota Extensionhttps://extension.umn.edu/gardening-minnesota/gardening-shade