Outdoor lighting
Landscape lighting ideas for safer routes and a calmer night garden
The short answer
Good landscape lighting makes movement and arrival easier without turning the whole yard bright. Light the job, not the whole yard. Start with the entrance, level changes, and decision points on the route. Add one or two selected features only after safety works. Keep fixtures shielded, light levels low, color warm, controls active, and intentional darkness between lit areas.
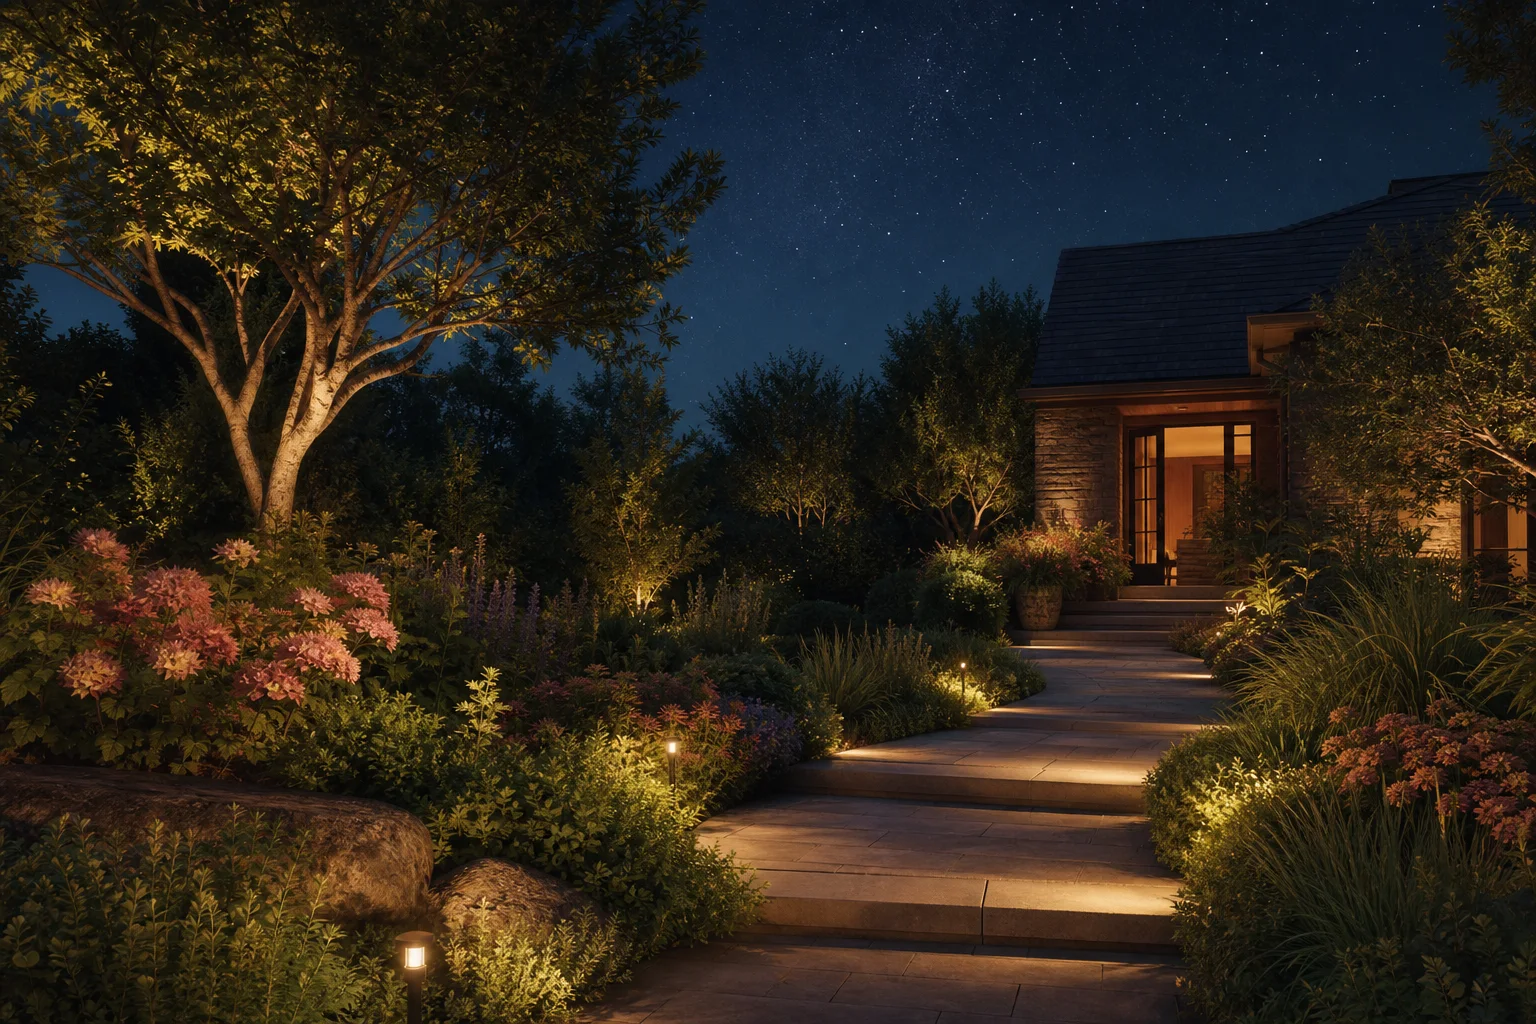
Walk the real route after dark
Daytime assumptions miss reflections, bright neighboring lights, hidden steps, and the way eyes adjust between bright and dark areas.
Start from the street, parking area, or back gate and walk toward the door. Record level changes, turns, thresholds, locks, house numbers, and places where someone must choose a direction. These are lighting jobs, not invitations to outline every bed.1,3
Notice existing light from porches, windows, streets, and neighbors before adding anything. One adjusted fixture may solve more than several new ones.
Photograph the route at eye level, but do not rely on a phone's automatic exposure to judge brightness. The final test must happen in person.
Match each light to a specific job
Choose the effect before the fixture. The useful surface should be easy to see, while the lamp itself stays out of normal sightlines.
Use the least light that makes the entrance, route, or selected feature understandable, and leave the rest dark.
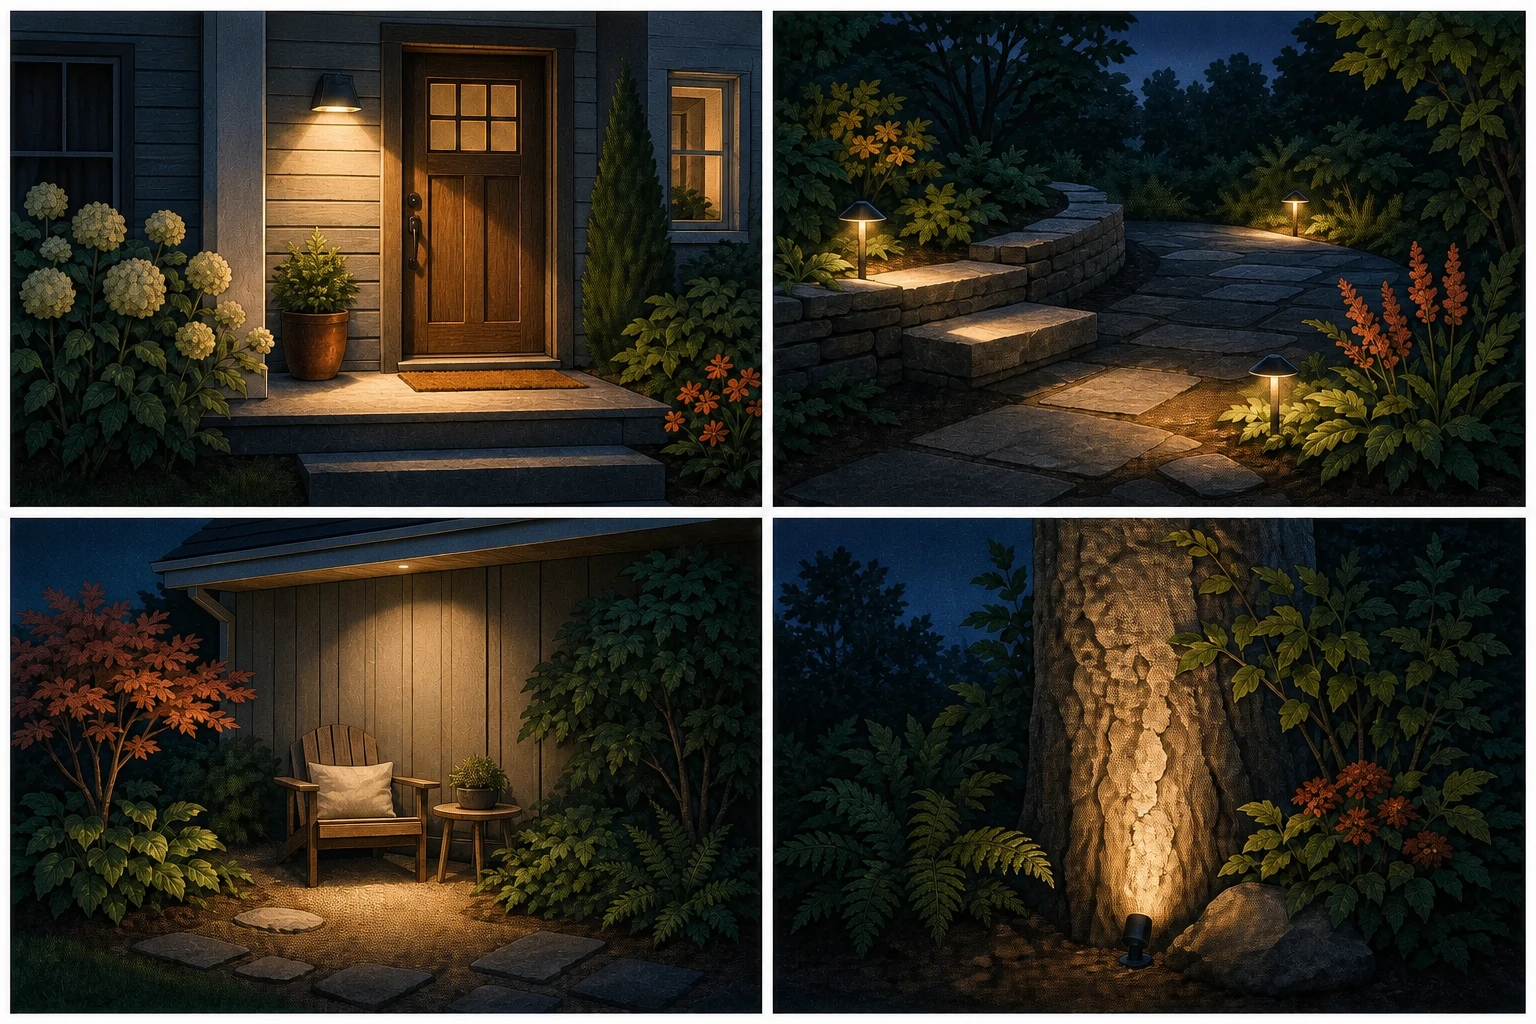
Shielded entrance light
Supports arrival
Reveal the door, lock, address area, and landing without shining into approaching eyes or nearby windows.
Path and step light
Supports movement
Place low, shielded light at level changes, turns, and decision points. Leave dark gaps instead of outlining the whole path.
Concealed downlight
Reveals an area without a visible lamp
Aim a hidden source from an eave or suitable structure toward a small seating or path area, keeping the beam on the useful surface.
Narrow accent light
Adds one deliberate focal point
After the functional lighting works, use one low-output beam on a tree trunk or wall texture. Keep the beam on its target and out of the sky.
Sources: DarkSky International and the Illuminating Engineering Society, DarkSky International
Lower the brightness and hide the source
Glare makes seeing harder. More fixtures can reduce comfort when the source is visible or the brightest surface is not the task.
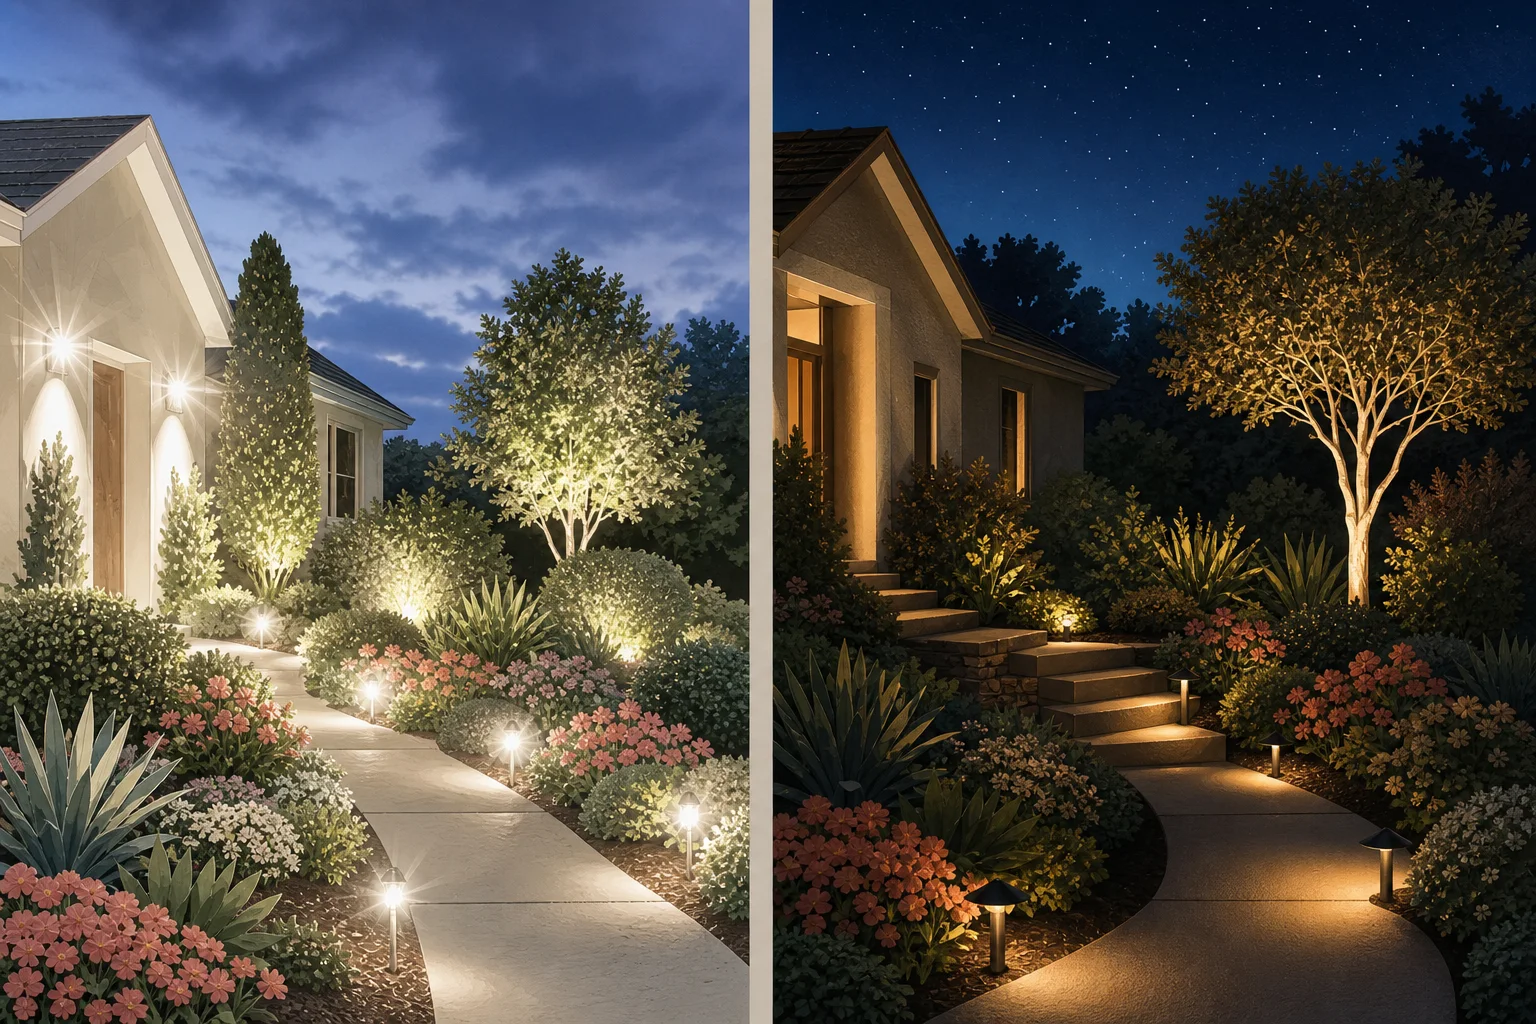
- Bright source, weak hierarchy
- Shielded, warm, targeted
DarkSky and the Illuminating Engineering Society summarize responsible outdoor light with five principles: useful, targeted, low-level, controlled, and warm-colored. Apply all five rather than treating warm color alone as the solution.1
Aim light downward or toward the intended surface, shield the source from normal viewpoints, and reduce output after the fixture is positioned. Check bedrooms, neighboring windows, sidewalks, and the sky.
Make the light responsive to actual use
A responsible system is not fully on from dusk to dawn by default.
- 1
Group by job
Put entry, route, and decorative lights on controls that match when each is needed.
- 2
Use timers or sensors
Turn lights off or reduce them when the task ends, while preserving any locally required safety lighting.
- 3
Recheck through the seasons
Leaves, snow, wet paving, and plant growth change reflection, shielding, and visibility.
- 4
Protect wiring and access
Use rated equipment and qualified installation. Keep transformers, junctions, and fixtures serviceable.
Electrical work, code compliance, and fixture ratings need local professional guidance.
Test from every affected viewpoint
Finish the design at night after installation, not from the daytime fixture layout.
Approach view: The next step and destination are visible without a lamp shining directly at the viewer.
Indoor view: Fixtures do not create distracting glare through living or bedroom windows.
Neighbor and street view: Light remains on the intended property and does not create a bright source for others.
Dark adaptation: Moving between lit and unlit areas feels comfortable because no zone is unnecessarily bright.
Frequently asked questions
What types of landscape lights should I use?
Use a shielded wall light for the entrance, low path or step lights only at turns and level changes, a concealed downlight where a small area needs gentle coverage, and a narrow accent light for one selected feature. Choose the effect and target first, then select a properly rated fixture and qualified installation.
Where should landscape lights go?
Start at entrances, steps, level changes, turns, and route decision points. Add a selected feature only after functional visibility works. Keep fixtures out of normal sightlines and light off neighboring property.
What color should outdoor landscape lighting be?
Use the warmest practical color for the task and keep output low. Color is only one factor; the light must also be useful, targeted, shielded, and controlled.
Should landscape lights stay on all night?
Nonessential decorative light generally should not. Use timers, motion response, or dimming so light is available when needed and reduced or off afterward, subject to local safety and code requirements.
 Gardenful
Design the night around the route, not the fixtures.
Use a daytime yard photo to organize paths, entry, and one focal feature with Gardenful. Then place and tune actual lighting on site after dark with locally appropriate equipment.
Gardenful for iPhone
Download the app free and start with a photo of your yard.

Sources(3)
- [1]Five Principles for Responsible Outdoor Lighting
DarkSky International and the Illuminating Engineering Societyhttps://darksky.org/resources/guides-and-how-tos/lighting-principles/
- [2]
- [3]Home Lighting Assessment
DarkSky Internationalhttps://darksky.org/get-involved/home-lighting-assessment/