Gardenful field guide
Landscaping ideas for a new construction home
The short answer
A new-build yard may look blank, but drainage, compaction, access, and unfinished work already shape the plan. Before choosing plants, map how water moves, where access must stay open, how construction changed the soil, and which view needs structure first. Test the soil, then plant one coherent area around the entrance or main outdoor room while the rest of the plan develops.
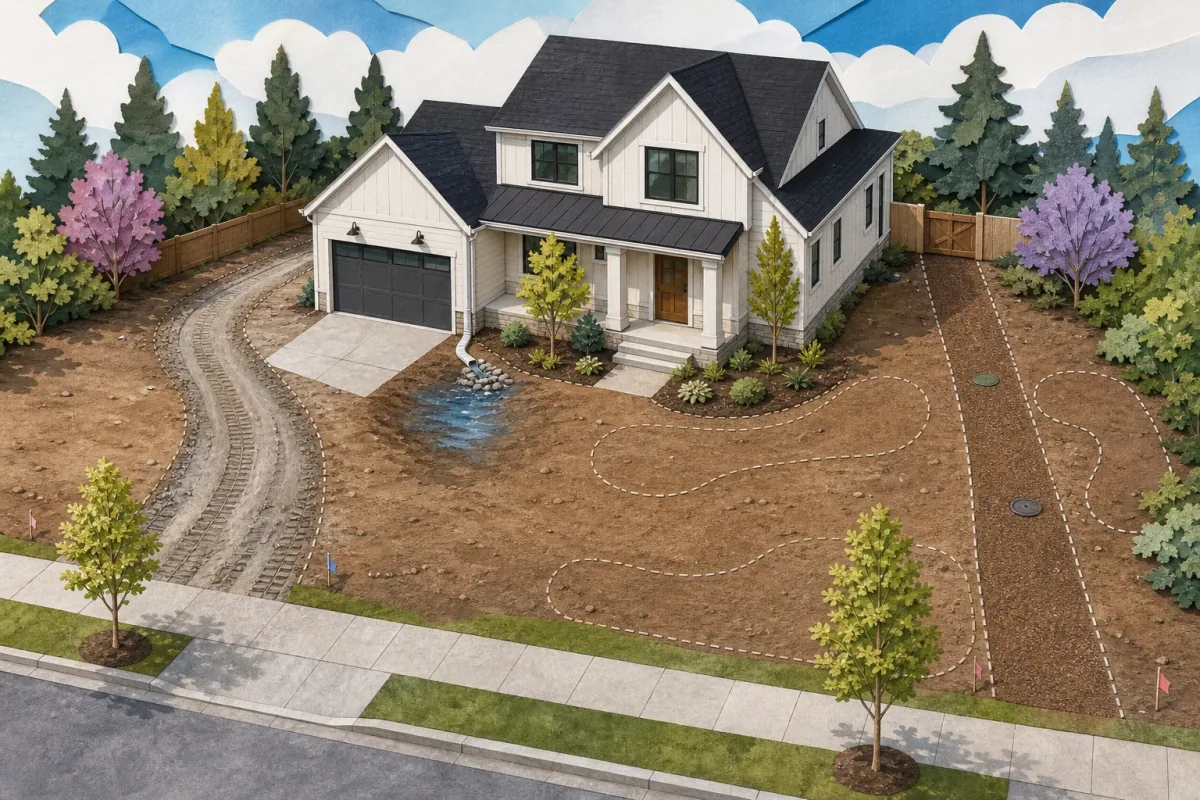
Read the lot before drawing beds
Walk the yard during or after rain and again when it is dry. Record what the construction process left behind before deciding what the finished landscape should look like.
Separate facts you can observe from drainage, soil, or construction questions that need qualified local advice.
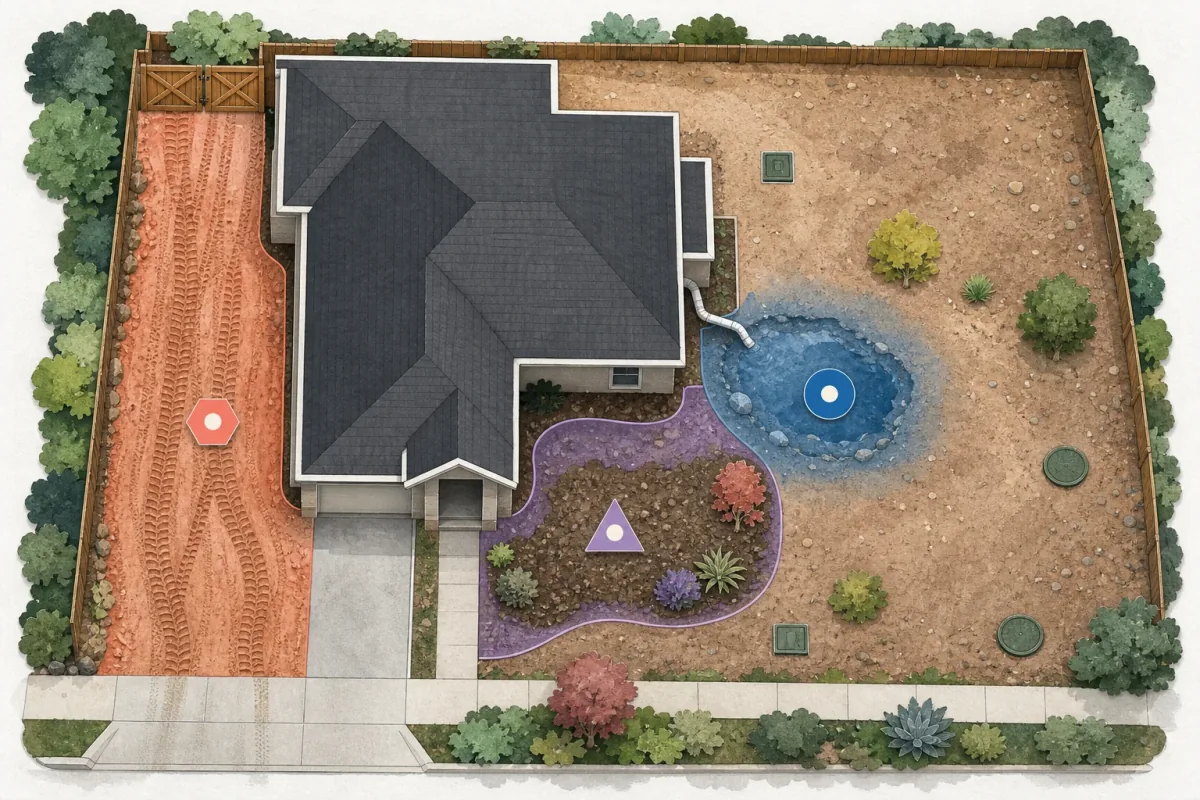
- 1
Construction disturbance
These clues help target testing and soil preparation instead of treating the whole lot the same.
Note tire tracks, hard bare patches, buried debris, abrupt soil changes, and places where a shovel will not enter easily.
- 2
Water movement
A plant bed should not be asked to conceal an unresolved water problem.
Photograph where water arrives, ponds, or leaves after rain. Keep foundation, drainage, and grading questions separate from planting decisions.
- 3
Permanent access
Future plants can then be sized around access rather than repeatedly cut back.
Mark utilities, meters, service gates, hose points, paths, downspouts, and the routes needed for maintenance.
- 4
Views and exposure
These observations reveal where the first structure or shade will matter most.
Record the entrance view, the view from the main rooms, neighboring sightlines, wind, and hours of direct sun.
Work in an order that protects the planting
A handsome bed installed too early can be damaged by later drainage, utility, paving, or exterior work. Resolve the larger site questions before buying plants.
- 1
First
Document
Measure the site and record water, access, exposure, existing vegetation, and soil disturbance.
- 2
Then
Resolve
Get appropriate help for drainage, grading, utilities, structures, and other work outside planting design.
- 3
Next
Prepare
Test representative soil areas and use the results to guide preparation or amendment.
- 4
Finally
Plant
Install the structural layer and repeat a small palette that fits the verified conditions.
Result
A planting plan based on settled site conditions
Keep the base map and test results for later phases.
What to check before moving on
Protect anything worth keeping: Fence off retained trees and their root zones before heavy work. Do not store soil, materials, or equipment against trunks or over roots.
Test representative areas: A front bed, former equipment route, and imported fill may behave differently. Follow the laboratory's instructions and use the results rather than applying a generic amendment recipe.
Prepare only after the site plan settles: Compost can improve some soils when used appropriately, but the amount and method depend on the existing soil and intended use. More is not automatically better.
A planting guide cannot diagnose grading, foundation drainage, hidden utilities, contaminated soil, or structural work. Bring those concerns to qualified local professionals.
Choose a first phase that changes daily life
You do not need to finish the whole lot at once. Start where a clear improvement can be used and maintained while the rest of the plan stays flexible.
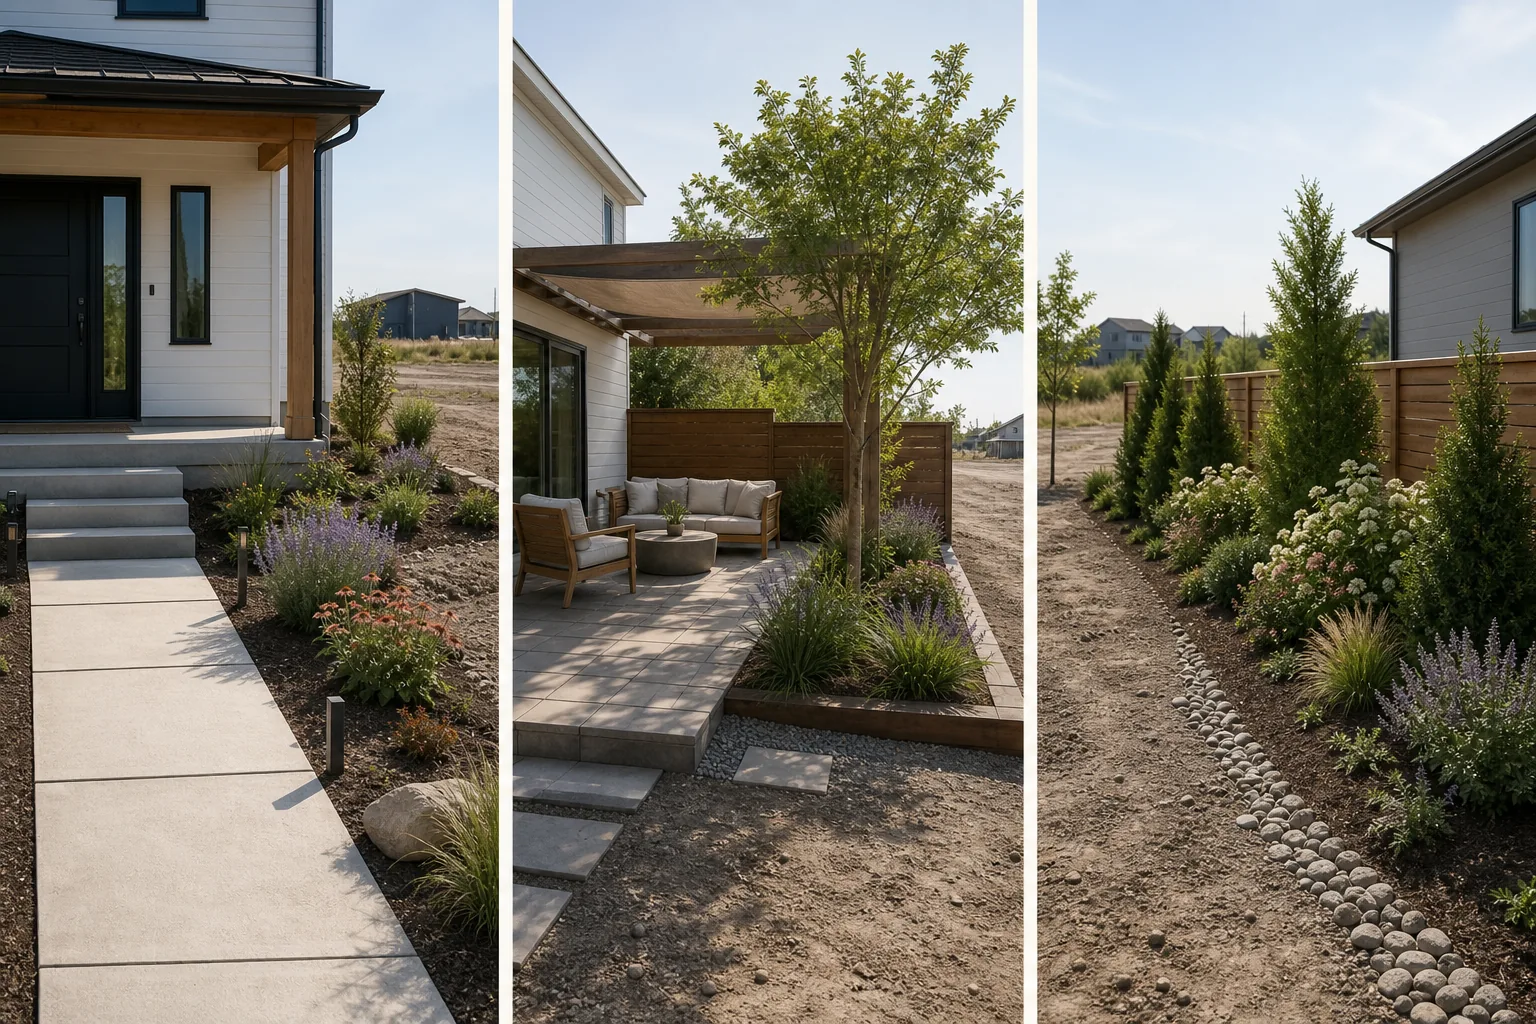
Entry planting
- Choose it when
- The house lacks a clear visual route to the front door.
- What it solves
- Adds arrival structure and a repeatable palette.
- Keep clear
- Walk, steps, windows, lighting, address, utilities, and mature width.
One outdoor room
- Choose it when
- A patio or sitting area will be used immediately.
- What it solves
- Adds shade, a useful view, or seated privacy where it is felt most.
- Keep clear
- Doors, furniture, circulation, heat sources, drainage, and access.
One exposed boundary
- Choose it when
- A specific neighboring view prevents the yard from feeling settled.
- What it solves
- Builds targeted screening without enclosing every edge.
- Keep clear
- Property line, utilities, light, airflow, and mature height and spread.
Leave future beds simple and weed-managed rather than filling them with temporary plants that conflict with the long-term plan.
Build the first planting from roles, not impulse buys
Choose the composition before choosing exact plants. This keeps the first phase coherent even when local availability changes.
An open entry with no shade and a long blank facade
The walk and drainage are resolved. The bed receives strong sun, and the measured area can hold one modest structural plant plus a repeated lower layer.
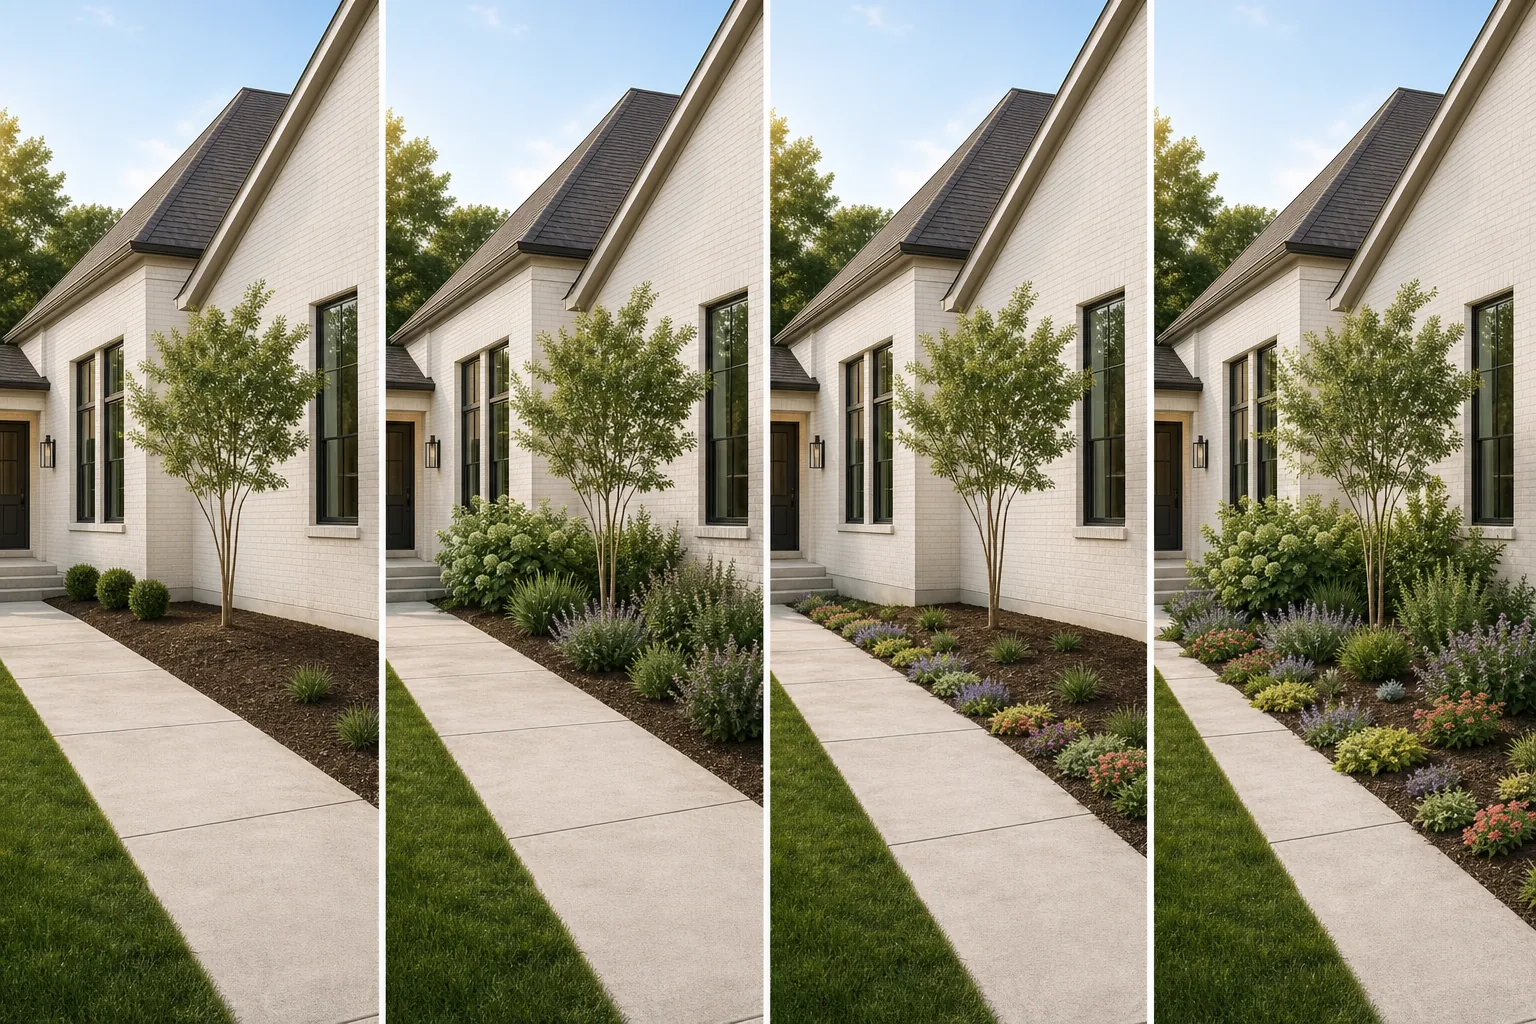
1
Set one structural anchor
Place a locally suitable small tree or large shrub where its mature form can balance the facade without blocking windows or the entrance.
2
Repeat one dependable middle layer
Use a small number of shrubs or long-lived perennials in visible masses rather than scattering many unrelated varieties.
3
Carry one low layer along the route
A restrained groundcover or low perennial can connect the entry sequence while preserving clear walking width.
4
Reserve room for growth
Draw mature widths on the plan and use mulch or a temporary cover crop where young plants have not filled in.
Verify exact plants for climate, soil, light, water, invasive status, and household needs. The framework should survive even if every plant name changes.
Check the plan before the first nursery trip
Bring the site facts with you. A plant that fits the picture but not the lot creates years of avoidable pruning, watering, or replacement.
A measured base map with utilities, access, windows, doors, downspouts, and retained trees
Soil test results for the areas that will actually be planted
Observed sun, wind, reflected heat, and water movement rather than a single weather-app estimate
Mature height and spread for every woody plant, including clearance from the house and routes
A watering and establishment plan that can be sustained through the first seasons
Local checks for invasive status, fire guidance, deer pressure, toxicity, and other household constraints
A phased landscape is not unfinished. It is a deliberate way to learn the site and protect larger investments.
Frequently asked questions
What should I landscape first at a new construction home?
Document drainage, soil disturbance, utilities, access, sun, and retained vegetation first. After larger site issues are resolved, begin with the entry, one outdoor room, or one exposed sightline rather than spreading a thin budget across the whole yard.
Should I add topsoil to a new-build yard?
Do not assume imported topsoil is the answer. Test representative areas and inspect the existing soil profile first. The right preparation depends on compaction, texture, drainage, organic matter, the intended plants, and local conditions.
How do I landscape a new home on a budget?
Create the full base plan, then install one useful phase with fewer plant types and enough room for them to mature. Spend first on site problems that would otherwise force rework, and keep later areas simple rather than filling them with temporary purchases.
When should landscaping happen during construction?
Protect retained trees and soil early, but delay permanent planting until heavy access, utility, drainage, grading, and exterior work are complete. Coordinate timing with the builder and qualified local contractors because the sequence varies by project.
Can Gardenful plan an entire new construction landscape?
Gardenful can help explore a planting-led visual direction and plant palette from a clear photo. It does not replace a measured site plan or professional advice for grading, drainage, structures, utilities, permitting, or construction.
 Gardenful
See a coherent first phase before you plant.
Use a clear photo of the resolved site to compare a focused entry, outdoor-room, or screening direction before choosing the exact local plants.
Gardenful for iPhone
Download the app free and start with a photo of your yard.

Sources(4)
- [1]
- [2]Preplant Soil Assessment
University of Florida IFAS Extensionhttps://edis.ifas.ufl.edu/publication/SS534/pdf
- [3]How to Use Compost in Gardens and Landscapes
Oregon State University Extensionhttps://extension.oregonstate.edu/catalog/em-9308-how-use-compost-gardens-landscapes
- [4]Basic Principles of Landscape Design
University of Florida IFAS Extensionhttps://edis.ifas.ufl.edu/publication/EP375/pdf